Showing posts with label Historical food. Show all posts

Sunday, 19 January 2020

1920s cocktails and their 2020s legacy - with recipes

2020 has become the Summer of Cocktails in my house, due to my having discovered the How to Drink YouTube channel.  This is an excellent channel which I highly recommend if you're at all interested in cocktails, their history, and how to make them.  It's well produced, well presented, and very informative.

On the left we have the monkey gland, and on the right we have the bee's knees.  These 1920s cocktails really deserve to make a comeback.


This video presents five cocktails invented during the 1920s.  I tried two of the recipes (the ones I had the ingredients for), and was impressed.  Here are the recipes I use for the pictured cocktails:

Honey syrup is very easy to make.  You dissolve half a cup of honey in half a cup of hot water, et voila: you now have honey syrup.


The monkey gland is an aromatic drink with notes of aniseed from the absinthe and a bright, fruity taste, like tropical punch for adults.  The grenadine gives it a gorgeous psychedelic peach colour which I absolutely love (and which unfortunately does not photograph well).  Greg from How to Drink recommends spritzing a tiny amount of absinthe into the glass with a small spray bottle instead of adding absinthe when you mix the drink, which I find works really well.  I also suggest adding about 10 ml of lemon juice.  It's not in the original recipe, but it really gives the drink a little extra something.

The bee's knees is less complex and not as colourful, but makes up for it by being magically delicious.  It's like a lemon honey drink, and if you drink it hot when you have a cold it will probably make you feel a whole lot better.  Greg's 1920s version doesn't include orange juice, but some recipes do, and I like it with a splash of orange in there.  I've stuck to the 1920s 1:1:1 ratio, with equal parts gin, honey, and citrus.

It turns out few of the well known classic cocktails were actually invented in the 1920s.  The 1920s brought prohibition to the United States (and parts of Europe), and during this period the goal of cocktails was often to mask the taste of questionable bootleg hooch.  That said, 20s cocktails were creative in their own way, and their legacy is still with us today.  Take a look at any bar's cocktail menu and you'll find a long list of sweet, dangerous drinks that don't taste like alcohol.  These drinks are the descendants of 1920s cocktails.

Previously, mixed drinks had been all about the alcohol. If someone offers you pineapple punch today it's probably going to taste mainly of pineapple juice, regardless of what else is in it.  We think of punch as a fruit juice based beverage that could be either alcoholic or non-alcoholic.  But the pineapple punch recipe from Jerry Thomas's 1862 bartending guide How to Mix Drinks contains 4 bottles of champagne, 1 pint of Jamaica rum, 1 pint brandy, and 1 gill of curacao, along with 4 sliced pineapples and the juice of 4 lemons*.  Mixed drinks that didn't taste alcoholic existed in the 19th century, but they were unusual.

The 1917 book Recipes for Mixed Drinks by Hugo Ensslin is noticeably more modern than How to Mix Drinks, but still very much a product of the same tradition.  Hugo Ensslin's recipes generally contain two or three different types of spirits, which might be enhanced using bitters, syrups, or citrus juice.  Like Jerry Thomas's recipes they focus on the flavours of the various spirits and liqueurs used to make them.

These cocktail recipes were apparently on the menu at the Savoy in London during the 1920s and are similar to the recipes in Hugo Ensslin's book, but in the United States a different trend was emerging.  In America cocktails started to include only one or perhaps two kinds of spirit, generally gin or rum, depending on your proximity to Cuba and its rum smuggling routes.  Clear spirits dominated the US market during prohibition because they were quicker and easier to make, and easier to conceal.  But they often didn't taste great, and even after prohibition was repealed American spirits were often poor quality, so it was necessary to add sweeteners and other flavouring agents.  This resulted in drinks like the bee's knees, where the alcohol component is completely overpowered by other flavours.

Soft drinks were also becoming more widespread at this time, in part because of technological advances and partially because Americans drank them as an alternative to alcoholic beverages.  It was only a matter of time before people decided they made good mixers. 

So yes, I think the 1920s changed the way we think about drinks in general.  The evolution of colourful, fruit flavoured cocktails does appear to coincide with the 1920s.  They became popular in the US and took off in other countries as well, because while not every country had prohibition, most people like fruit drinks.

And you know, we can learn from the drinking habits of the 1920s.  This economy is pretty tough for a lot of us.  If you're on a budget and choose your gin for reasons of economy rather than flavour, why not improve it by making a South Side fizz?  Apparently it was Al Capone's favourite, and for all his many faults he was an expert on the subject of dodgy gin.


* This is a fairly typical Jerry Thomas punch recipe.  Those drinks are called "punch" for a reason.

Monday, 6 January 2020

You can make sangria with beer, but do you want to?

Answer: yes.  Go on, try it.  For science.

Happy new year, readers!  I hope you had a lovely break and that 2020 brings you great things.


Ale sangaree, 1860s style


This sangria made with ale is brought to us by Jerry Thomas, in his 1862 book How to Mix Drinks.  It's a simple recipe, and very different from the wine and fruit based sangrias we're used to in the 21st century.  In Jerry Thomas's book sangria, or sangaree as he spelled it, refers to a group of drinks made by flavouring alcoholic beverages with sugar and nutmeg.  There's no fruit or Rioja wine to be found anywhere in the How to Mix Drinks sangria section. 

Sangria as we know it today first appeared in 1964, at the New York City World Fair.  By the mid 20th century the whole concept of what a cocktail should taste like had changed significantly, which is a subject I plan to explore in a future post.  But today, let's explore what sangria tasted like in the 1860s.


The sugar and nutmeg really accentuate the ale's caramel malt flavours.  However, it's not particularly sweet and still recognizably beer.  It tastes like ale with a very rich, sweet malt base, and if you didn't know it had sugar in it, you probably wouldn't guess.  The nutmeg works surprisingly well and gives the beverage pleasant spicy overtones.  All up, it's an interesting and enjoyable way to serve ale.

It pairs well with salty snacks such as olives, chips, and tomato based dips.

My sangaree is made with APA, and I think you do need to use something with a strong malt base like an APA or brown ale, not a lager or IPA.  I also recommend using brown sugar, not white, because white sugar won't give you the same caramel flavours.  Highly refined white sugar was a luxury product in 1862, so I suspect the sugar Jerry Thomas used was closer to what we would think of as brown or raw sugar.

Thursday, 19 September 2019

Clareyt: a balanced medieval wine


Balance was an important concept for the medieval cook, because medieval medical theory held that different foods increased the production of different humors within the body.  Thus, eating the right foods was essential to keeping your humors properly balanced.  Balancing your humors would help you recover from disease and, ideally, avoid disease in the first place, so eating a balanced diet was essential.

Medieval dietetics was a complex subject (see this link for a nice overview).  If you could afford it, you could get a physician to prescribe an individualized diet designed to help you achieve an optimal balance of humours.  In general, cooks tried to balance dishes according to the properties the ingredients were perceived to have: hot, cold, dry, and moist.

This clareyt recipe from the Netherlands is very similar to the hyppocras I made previously, but using white wine instead of red.  The term clareyt or clareit usually, though not always, meant a spiced white wine*, which had been strained through a cloth to remove any sediment.

It conforms well to medieval ideas of balance.  In this recipe white wine, considered cold and moist according to Hippocrates, is balanced with spices which were considered hot and dry.  According to medieval medical theory the ideal balance for humours should be slightly warm and slightly moist, i.e. slightly sanguine, so a wine which has these characteristics is obviously a healthy drink that will promote a good balance of humors.

Om goeden finen witten clareyt te maken

Om goeden finen witten clareyt te maken.  Neemt twee vierendeel ende een half pinte witten wijn of petau Dan neemt van dien wijn een lettel ende maecten werm in dien wijn doet bruyn suycker ende rueret so lange tot [28] dat dit suicker al wel ghesmolten es in dien wermen wijn Dan mingelt daer in een once ende een half once van de[30]sen na volghende poeder wel ende seer Dan suldijt ghie ten duer den sack acht oft neghe weruen ende clarify ceret Dyts dat poedere Neempt wt ghelesen caneel witten ghimber/ greyne lanck peper/ galigaen calini aromatici coriander asi. Maect hier af poedere ende laet al met duer loopen

To make good fine white clareyt

To make good fine white clareyt. Take two vierendeel [approx. 1.3 litres or 2 pints each] and a half pint of white wine or [wine of] Poitou. Then take a little of this wine and make it warm; into this wine put brown sugar and stir it as long until the sugar is all well melted in the warm wine.  Then thoroughly mix into it an ounce and a half of this following powder. Then you shall pour it through the sack eight or nine times and clarify it. This is the powder. Take fine cinnamon white ginger, grains of paradise, long pepper, galingale, sweet flag [Acorus calamus], coriander in equal parts. Make powder of this and let it all run through [the sack] together.

From Een notabel boecxken van cokeryen, English translation by Christina van Tets.


The original recipe makes 2.6 liters, while my modernized recipe is optimized to make one 0.75 liter bottle of clareyt.

Long pepper, grains of paradise, and galangal can be hard for a 21st century cook to obtain.  It’s worth trying your Indian grocer or an online supplier, and I've provided what I think are reasonable substitutions.  The original recipe also calls for sweet flag, a plant used in traditional medicine to aid digestion.  It probably features in the recipe because of its perceived medicinal benefits.  However there are few clinical studies on its effects “due to concerns of toxicity”.  I have omitted sweet flag from my recipe and I suggest you do too.


Ingredients 

1 bottle white wine
Brown sugar, to taste
½ teaspoon ginger
½ teaspoon cinnamon
½ teaspoon grains of paradise (substitute with a mix of black pepper and cardamom)
½ teaspoon long pepper (substitute with black pepper, nutmeg, and cardamom)
½ teaspoon galangal (substitute with more ginger)
½ teaspoon coriander

Instructions

Heat a small quantity of the wine, and add the spice powder and half a teaspoon or so of brown sugar.  Stir until the sugar dissolves, then add the rest of the wine then strain it all through a cloth to get the sediment out.

These kids of recipes were intended to be made with sweet wine so I used moscato to make my clareyt, and if I make it again I'll consider leaving the sugar out entirely.  I don't think it's really necessary, but maybe 16th century Netherlanders had more of a sweet tooth than I do.

Unlike mulled wine today, clareyt was served cold (presumably cellar temperature, not fridge temperature), and a similar recipe in the same book recommends the clareyt is better if it's allowed to sit for a day before drinking, so I let it sit for a day before trying it.

For a modern wine drinker, clareyt has a strange taste.  It's sweet and a little syrupy, like a dessert wine, but it has clear notes of pepper and ginger with a warm, peppery after taste.  It tastes more like some kind of cordial than a wine, or maybe a wine-based cocktail.  Presumably that's how it's supposed to be, but it's so hard to know how these things tasted in period.

I want to try this recipe with other types of white wine like Riesling or chardonnay, because I think the results could be interesting.  And from a modern perspective, treating it like a cocktail opens up interesting possibilities.  What if it was served over ice, with a garnish of lime and sliced ginger?  There are a lot of summer drink possibilities here.


The Historical Food Fortnightly challenge: Balance.

The receipt/recipe: White clareyt from Een notabel boecxken van cokeryen.

The date/year and region: 16th century, from the Netherlands, but these recipes were popular all over medieval Europe.

How did you make it: See above.

Time to complete: 20 minutes, plus a day's waiting time.

Total cost: $9.50 for a bottle of Banrock Station moscato.

How successful was it?  On the whole I prefer hyppocras, but that's just because I'm more of a red wine drinker.  It's a very pleasant drink, and if you enjoy sweet wines you'll probably like it a lot.

How accurate is it?  I'm not sure how moscato compares to the kind of wines that would have been used, so it's hard to tell.


*  The term claret came to refer to French red wine around the beginning of the 17th century. 

Thursday, 20 June 2019

14th century hippocras for the 21st century consumer

Happy Solstice everyone!


Down here, of course, it is Yule.  Mulled wine is traditionally associated with midwinter, so this week I tried the medieval ancestor of the mulled wines we enjoy today: a hippocras recipe from 14th century France.


This recipe comes to us from the Jérôme Pichon’s book Le Ménagier de Paris, dated to around 1393 CE.

HIPPOCRAS. To make powdered hippocras, take a quarter-ounce of very fine cinnamon, hand-picked by tasting it, an ounce of very fine meche ginger and an ounce of grains of paradise, a sixth of an ounce of nutmeg and galingale together, and pound it all together. And when you want to make hippocras, take a good half-ounce or more of this powder and two quarter-ounces of sugar, and mix them together, and a quart of wine as measured in Paris.And note that the powder and the sugar mixed together make "duke's powder".
English translation by Janet Hinson and available here.


I chose it because it’s simple to make, and because unlike some hippocras recipes the quantity of sugar involved is reasonable.  Some of these recipes were pure bottled diabetes.  Since most of us today buy our wine in 750ml bottles, I've developed a modernized version of Pichon’s recipe which makes a 750ml bottle of hippocras.


Ingredients:

1 bottle of wine (I've used a merlot rosé - see the section on red wine to find out why)
½ teaspoon ground cinnamon
⅓ tablespoon ground ginger
⅓ tablespoon grains of paradise (or substitute a mixture of black pepper and ground cardamom – grains of paradise usually aren’t readily available today)
¼ teaspoon ground nutmeg and galangal (if you don’t have galangal just use nutmeg, as galangal tastes somewhat like ginger anyway)
¾ tablespoon of brown sugar

Heat a small amount of wine and stir in the sugar and spices until the sugar dissolves.  Add the rest of the wine, and strain the mixture through a cloth to remove the sediment.  This is an important step which Pichon’s recipe omits to mention, because he assumed all his readers would know you have to strain hippocras.  Its name actually comes from the “Hippocratic sleeve” used to strain it.  You can make a Hippocratic sleeve at home by placing a cloth inside a funnel.

You may be thinking “Wow, that’s a lot of pepper”, and yes, it is.  Unlike modern mulled wine recipes, hippocras typically did contain a lot of pepper or grains of paradise, which taste similar to pepper.  It also seems to have been drunk at room temperature, not heated.


What’s it like?

Surprising, and I mean that in a good way.  Hippocras tastes unusual to a 21st century palate, because we're not used to the combination of pepper, ginger, and wine.  But it's an enjoyable drink full of complex flavours that complement the wine nicely.  If you consider your wine pairings, you’ll find spicy foods are often suggested as a pairing for different styles of rosé wine.  Peppery, spicy flavours work very well with the right choice of wine.

The pepper isn't as noticeable as you'd think, but it's definitely there and it gives the drink a pleasant level of heat, while the ginger and cinnamon enhance the wine's fruit flavours.

Personally, I think it could use a little more cinnamon and nutmeg, so measure those generously if you make the recipe.  I would also be inclined to skip the sugar next time, or perhaps to use honey instead.


Red wine in the Middle Ages

For the best approximation of a 14th century hippocras, I suggest choosing a rosé instead of a red.  This is because medieval red wines were very different from the reds we enjoy today.  They were pale coloured, more like a modern rosé, and fairly low in alcohol.  They were also drunk very young.  Medieval people preferred to drink new wine where possible because the wine tended to be poor quality by today’s standards, and it didn’t age well.

Apparently darker coloured wines were considered desirable, and there are several extant recipes for using food colouring to improve the colour of wine.  Shortly after his hippocras recipe, Pichon supplied a recipe for making white wine appear red:

TO MAKE WHITE WINE RED AT THE TABLE, take in summer the red flowers which grow in the wheat, called rose-mallow and other names, and let them dry until they crumble into powder, and secretly drop them in the glass with the wine, and it will turn red.

Did this really fool people into thinking they were drinking red wine?  Medieval wine must have been very different from 21st century wine if colour was the only way people could tell whether they were drinking white or red.  Even with a lot of spices in there, it should be possible to tell the difference.  I now have many, many questions about just what exactly wine was like in the 14th century.

Anyway, back to the hippocras.  Despite the variable quality of medieval wine, hippocras wasn't intended to mask the taste of bad wine.  No one would want to waste expensive spices on bad wine, and some recipes specifically suggested using high quality wine if it was available.  In the Middle Ages high quality meant fruity young wine with a deep, rich colour; in a modern context I recommend a full-bodied wine at the sweeter end of the spectrum.


The Historical Food Fortnightly challenge: Solstice.

The receipt/recipe: Hippocras from Le Ménagier de Paris.

The date/year and region: 14th - 15th century France.

How did you make it: See above.

Time to complete: 20 minutes.

Total cost: $10.99 for a bottle of Peter Yealands merlot rosé.

How successful was it?  I like it!  This is definitely something I'll make again and, as an added bonus, you can get suitable wines very cheap if you shop carefully.

How accurate is it? I used a 14th century recipe and tried to choose a wine similar to what I think was used in period, but I'm not an expert in medieval wines and therefore I'm not sure how well the taste matches 14th century hippocras.

Monday, 29 April 2019

Mushroom ketchup: not as expensive as you think


This post is all about my attempt at one of the signature flavours of the 18th century: mushroom ketchup.  Mushroom ketchup was to the 18th century what garum was to the Romans, an all purpose flavouring agent used in a wide variety of dishes, and in fact the taste is not unlike fish sauce.  It's a salty, savoury, umami flavour.

Due to the popularity of mushroom ketchup, historical recipes tended to assume you were making the stuff in industrial quantities, which is prohibitively expensive for most of us today.  But do you, as a modern cook, actually need an industrial sized bucket of mushroom ketchup?  In this post I'm going to make a smaller, affordable quantity of this ketchup using about 500 grams of mushrooms.  If you do need a large quantity of it, here is an awesome cheat recipe made with mushroom bouillon.

Recipes for mushroom ketchup varied, but they all followed the same basic pattern.  You salted your mushrooms and left them to sit for a while so the salt could draw out the mushroom liquor, then you squeezed all the liquor into a pot, boiled it with spices, and strained it again into bottles.  Some cooks added wine or ale, but this was apparently optional, and the spices involved varied.


Here is a recipe from Hannah Glasse's The Art of Cookery.


And here is John Farley's version from The London Art of Cookery.  The similarity in titles, by the way, was probably not accidental.  Farley seems to have "borrowed" a lot from Hannah Glasse, who herself plagiarized earlier authors.


At least one recipe requires the salted mushrooms to be placed in a low oven for 24 hours, but I don't care to leave the oven on for a full 24 hours with no one to watch it while I sleep and go to work and besides, not all recipes included this step, so I just put my casserole dish full of mushrooms next to the hot water cylinder.  Note that I have chopped my mushrooms to make them easier to squeeze.

Here is what I ended up with.  At this point the mushrooms have been sitting for a full 24 hours and have released an amount of juice which, frankly, surprised me because I had expected some liquid to be visible, but as you can see there's none.  They smelled good though, so there's that.


Maybe this is why John Farley says to leave the salted mushrooms for four days, and maybe Hannah Glasse didn't say to heat the mushrooms because her audience already knew that.  But my mushrooms weren't looking good.  Hmmm.  What if I zapped them in the microwave?  Microwaving things makes them soggy, right?

Now we're getting somewhere!  In this picture they've been microwaved for five minutes.


I microwaved my salted mushrooms for one minute at a time on medium power, about fifteen minutes in total.  I took them out to check their progress after each minute and kept going until there was a lot of liquid in the dish and the mushroom pieces were soft.

It seems you do need to heat the mushrooms in order to extract their liquor, but you can totally cheat and use a microwave.

Here's my modernized version of Hannah's mushroom ketchup recipe.  For around 200 mls of ketchup you will need:

500 grams mushrooms
About 2 tablespoons of table salt (it doesn't need to be exact)
1 teaspoon whole peppercorns
1/8 teaspoon ground cloves
1/8 teaspoon ground mace
1/8 teaspoon ground ginger

Clean your mushrooms, remove the stalks, and chop them.  Layer them in a pan with the salt sprinkled over them and leave them somewhere warm until they're soft and sitting in a nice pool of mushroom liquor or, y'know, help them along in the microwave.

Squeeze all the mushroom liquor into a saucepan using a cloth.  This will take a lot of squeezing, and you will be able to extract a lot more liquor than you think.  Don't throw the squeezed mushrooms away, you can dry them completely and use them for cooking.

Add the spices to your saucepan and simmer it, covered, for 15 minutes, then cool it and strain it into a bottle.  The ketchup will be watery, and that's okay.  It's a concentrated flavouring not a sticky condiment.  You add small quantities of it to boost the flavour of stews and gravies.

If you have a whole kilo of mushrooms (try the farmers' market), it's worth doubling this recipe because it is labour intensive and trust me, you will find plenty of uses for mushroom ketchup.  It's delicious.  There's a reason people in the 18th century were nuts about this stuff.  It tastes, obviously, of mushrooms, but with wonderful aromatic citrus and gingery top notes from the spices.  10/10, this stuff deserves to make a comeback.

Thursday, 25 April 2019

Beef stewed savorily

Beef stewed savorily, from John Farley's The London Art of Cookery.  Just look at that cross section!


This is another John Farley recipe.  It's a kind of pot roast, made with beef sirloin which has been stuffed with forcemeat, rolled up, and braised in a stew pan.

The recipe.  I used fish sauce instead of anchovy liquor, because I didn't have any.  I didn't have oysters either, but they're optional anyway.


I used rump steak for this recipe, because the cut of meat now known as rump in the UK and Australasia is roughly equivalent to what 18th century Londoners called the sirloin.  We know this because Mr Farley included a helpful diagram.  He also included a forcemeat recipe, which I made ahead of time and refrigerated.  It only takes about half an hour to make and I can assure you it's time well spent.

That's why the lighting is different in this photo - it was taken the night before.


This is the forcemeat.  It's made from minced meat and bacon cooked with mushrooms, shallots etc. and whizzed in the blender pounded in a mortar until smooth.  It's supposed to be made with veal, but I used a 1:1 mixture of beef and pork.  It tastes amazing and is unquestionably the best part of the entire dish.

Beef stewed savorily is not a difficult recipe to make.  Here you can see my piece of rump steak with forcemeat spread all over it.  All it needs now is to be rolled up like a Yule log made from meat and secured with string.

Two Yule logs, technically, because the rump steak came in two pieces.


I was apprehensive about the stewing part because this is the first time I've ever stewed meat.   I braise meat all the time in the oven and I know this is pretty much the same thing, but when I was a kid stew was one of the things mum made that I absolutely hated, and as a result I've never cooked it.  So I was a little worried the stewing process would ruin this very promising rolled roast.  But Mr Farley didn't let me down.  After consulting the Google academy of culinary skills, I seared the meat well on all sides, and stewed it on a low temperature for two hours.  It came out delicious and very tender, although the beef part was a little bland.  I had suspected this might happen, so while the beef was stewing I made French olive sauce with some of the cooking liquid.

Meat does tend to lose its flavour when boiled, and in the 18th century meat was often boiled, which is most likely why The London Art of Cookery contains an entire section on mouth-watering sauces for all occasions.

The recipe doesn't specify what sauce was intended to be served with beef stewed savorily; presumably this was not something Mr Farley thought he should have to spell out for his readers.  French olive sauce was a great choice, but any rich, savoury sauce or gravy would work well.


The Historical Food Fortnightly Challenge: Savoury.

The Receipt/Recipe: "Beef stewed savorily" from John Farley's The London Art of Cookery.  Technically, however, this is a three-for-one package of savoury recipes since in order to make it I first had to make Hannah Glasse's mushroom catchup (blog post forthcoming) and John Farley's forcemeat recipe.

The Date/Year and Region: 18th century London.

How Did You Make it: As per the recipe, I stuffed a piece of beef with forcemeat, rolled it up, and stewed it.

Time to Complete: All up, just over two hours, but two of those hours were cooking time.  The forcemeat took another half hour.

Total Cost: Including the mushroom ketchup and the forcemeat, the total cost came to around NZ$30 (currently roughly equivalent to US$20).  It's not a cheap recipe.  But on the other hand, I have plenty of forcemeat and ketchup left over for future recipes, and some good stock for sauces.

How Successful Was It?  Very.  This is something I'd happily serve to guests, and as long as you've made your forcemeat ahead of time it has potential to be a dish that looks impressive without requiring a lot of effort.  You do, however, need to serve it with a good sauce or gravy, and you do need to take the time to make the forcemeat stuffing.  Don't be tempted to cheat and use sausage meat, you'll regret it.

How Accurate Is It? I used modern kitchen equipment and made a couple of ingredient substitutions, but for the most part I followed the original recipe and I believe my beef stewed savorily probably turned out the way John Farley intended.

Tuesday, 16 April 2019

My new favourite sauce


I recently got an ebook version of The London Art of Cookery by John Farley, first published in 1783, which is available free on Google Books or at Archive.org.  There are some good-looking recipes in this book and I'm excited to try them.  So when I braised some beef on the weekend and didn't want to waste the braising liquid, I made French Olive Sauce from page 149.  This is a very simple sauce recipe.  All you need to do is simmer olives in stock, and season with salt, cayenne pepper and lemon.


Although this is an 18th century recipe, it has what I think of as a very modern taste: strong and salty with rich umami overtones.  It goes well with beef and vegetables, and I strongly recommend it.

Like many recipes from this time period there are no ingredient quantities listed.  This is because you don't need exact quantities.  If you did, Farley would tell you, as he does with many of his other recipes.  With this one the quantities involved depend on how much sauce you want and how much of the ingredients you have available.  I used about a cup of stock and maybe half a cup of finely chopped olives.

The recipe doesn't specify whether to chop the olives, but I recommend chopping them finely so they'll mix through the sauce.  The recipe doesn't specify how long to stew the sauce either, but mine simmered on a medium low heat for about an hour.  Depending on your stock, you may not need to add any salt, so be sure to taste the sauce before you season it.  If it doesn't thicken up as much as you'd like, a sprinkle of cornflour will solve that problem.  The recipe specifies veal stock, but I used beef stock and you could probably use any kind of stock, including vegetable stock if you wanted to make a vegan version.

Sunday, 24 March 2019

Marmalade cheese cake: a 1914 pie recipe


Today's historical recipe comes to us courtesy of the Edmonds' "Sure to Rise" Cookery Book, 1914 edition.  It looked easy, required few ingredients, and I like marmalade, so I tried it.  Why it's called a cheese cake when there is no cheese in the ingredients list is unclear to me, but never mind.  Let's dive in.

MARMALADE CHEESE CAKES.

  • 2 tablespoonfuls marmalade
  • 2 eggs
  • 2 ozs. butter
Melt the butter, beat the eggs, and add to marmalade. Line patty pans with puff paste (see recipe page 18), pour in the mixture, and bake in a quick oven.


I made one large pie instead of several small ones, and chose not to use the puff paste recipe on page 18 for several reasons.  Firstly, because I am unapologetically lazy when it comes to pastry.  Secondly, because the supermarket's ready-made puff pastry is much better than anything I’d be able to make, and thirdly, because if you do navigate to page 18 and check out that recipe, you’ll see it has baking powder in it.  Understandable in a book produced as a marketing tool to sell Edmonds' brand baking powder, but that’s not how you make puff pastry and I am suspicious.

Made with store-bought pastry, the "cheese cake" looked pretty good.  Sadly, looks can be deceiving.  I was hoping for something with a custard-like filling here, but what I got instead was a kind of marmalade quiche.  It doesn't taste bad, but it isn't amazing either.  If you like quiche and want to try a sweet one, this might be something you'll enjoy, but in all honesty I can't recommend it.  It's edible and it isn't horrible or anything, but I wouldn't serve it to guests.  Perhaps I was disappointed because our tastes in food have changed over the past 100 years, or because we expect more out of our desserts these days, or maybe this just wasn't a top tier recipe by 1914 standards.  I suspect all of the above.

If you're a fan of car-crash cookery, be sure to check out the "Sure to Rise" recipe for "tomato and macaroni", a weird parody of lasagne which consists of tomato, macaroni, and onion (and nothing else) layered in a casserole dish and baked.

Wednesday, 31 January 2018

No thank you, Mr Volstead

Human beings are problem solvers.  Other animals may be faster, stronger, or reproduce more quickly than us, but we think our way around problems.  So in 1920, when the Volstead Act outlawed the sale of intoxicating beverages, vast numbers of Americans discovered how easy it is to make alcohol.

Beer was easier to make than spirits, and didn't require any equipment that couldn't be found in a normal '20s kitchen.  This naturally made home brewing an attractive choice.  Making beer* at home was illegal under the Volstead Act, but in practice this part of the Act was too difficult to enforce and everybody knew it.  The Prohibition Commissioner himself admitted that "the government is not in a position to prosecute the non-commercial home brewer."

Prohibition-era beer recipes

The following is a fairly typical prohibition-era home brew recipe, kindly contributed by Stephen Hansen of Stanford University and published online by Realbeer.com:

  Ingredients: 
  • 1 can Blue Ribbon malt
  • 1 pack Fleishmann's yeast
  • 1 cup rice
  • 1 tablespoon salt
  • 5 pounds powdered cane sugar
Procedure: In a large (3 gallon) porcelain pan, add 3 quarts water and bring to boil. Add sugar, stirring. Bring back up to boil and add 1 can of malt. Return to boil again and let simmer for 15 minutes. Fill large glass 1/2 full of luke warm water (not over 130 degrees) and add rice, yeast, and salt. Clean crock and fill 1/3 full of warm water. Pour in wort. Add cold water to within 3 inches of top. Add yeast solution and cover. After 6- 10 hours remove foam with wire strainer. Let sit until hydrometer says "bottle." Fill bottles, adding 1/2 teaspoon sugar to each. Cap and let stand 21 days. Comments: Back when I first started making beer (about 20 years ago now) I actually made several batches using this recipe. The results varied from barely drinkable to snail bait. I especially like his comparison in the last line of the original---"This should make 5 cases of pint bottles of beer equal to or superior to Millers High Life."


The crock used in this recipe would have held around five gallons of liquid** and was intended for making pickles or sauerkraut.  Pickling crocks were a common piece of kitchen equipment during the early 20th century.  They were made of thick stoneware which helped to keep the beer at a nice even temperature for optimal fermentation.

Notice the recipe does not call for hops, which were already incorporated into the malt syrup.  Using a single can of hop flavoured malt extract supplemented with corn sugar or regular white cane sugar seems to have been the norm.  Supplementing (or even completely replacing) malt with other types of sugar had been relatively common in the United States during the colonial period because barley was not always available, and during prohibition home brewers revived this traditional practice.

Like their colonial ancestors, Americans of the '20s and '30s couldn't necessarily obtain malted barley.  But they could enjoy the latest modern convenience: concentrated malt extract packaged in convenient tins.

The malt to sugar ratio varied, but all the prohibition-era malt extract recipes I've seen use one can of malt and derive at least half the fermentable sugar from some type of baking sugar rather than malt.  Sugar was cheap, and readily available in large quantities without attracting suspicion from the authorities, but it does not make great beer.  This, in fact, is the main reason why recipes like the above example did not result in a very drinkable product: beer made with so much sugar would have been thin and unpalatable.

I suspect the reason so many prohibition home brew recipes were so similar is that they were all variations on the same original recipe.  If you had bought a can of Blue Ribbon*** malt and weren't quite sure how to turn it into beer, you could write to the address on the tin for a free recipe booklet.  It was a nice printed book containing a wide variety of recipes made with malt extract, and not a word about beer.  A couple of weeks later, you would get a plain brown envelope with no return address in the mail, which contained a mimeographed sheet of instructions for making beer.  This arrangement was in operation right up until the '70s, because home brewing was illegal in the United States until 1978.


Beer for everyone

Regardless of what the beer tasted like, these prohibition-era malt extract recipes were revolutionary.  They were very simple recipes made with inexpensive ingredients which were legal and available at the local grocery store.  Even if you had never made beer before and knew nothing about brewing, you could easily follow one of these recipes.

Using malt extract meant home brewers didn't need to mash their own grains to make wort, and this was important.  Mashing is time consuming, and requires the brewer to have some idea of what they're doing.  It also requires the brewer to obtain malted barley, and creates large quantities of spent grains which then have to be disposed of somehow.  Malt extract makes the brewing process less complicated, and more discrete.

Thanks to malt extracts and recipes that used them, home brewing became quick, easy, and inexpensive.  This allowed home brew to be made on a scale that has not been seen before or since.  It's impossible to know exactly how much home brew Americans made during the prohibition years, but the numbers we do have are staggering.

In Cleveland alone it was estimated that by 1923, 100,000 residents were making beer or spirits.  To put this into perspective, the 1920 census recorded a total of 116,545 dwellings in Cleveland.

In Detroit, the state Bureau of Taxation reported that 14 million gallons of home brew were produced between January and July 1932.  That was just the home brew they knew about.

These isolated data don't give us a comprehensive picture of home brewing during prohibition, but they do illustrate the popularity of home brewing, and the fact that it had become both accessible and convenient.


*  Making wine at home for personal consumption remained legal.  There were exemptions in place for wine due to its use in Holy Communion.

**  Prohibition home brew recipes typically yielded about five gallons, because that was the typical size of a pickling crock.  Even today most home brew recipes will yield about 5 gallons, and I have to wonder whether this is a remnant of the prohibition tradition that has somehow been retained.

***  Yes, that's Blue Ribbon as in Pabst Blue Ribbon.

Tuesday, 16 January 2018

A brief history of malt extracts


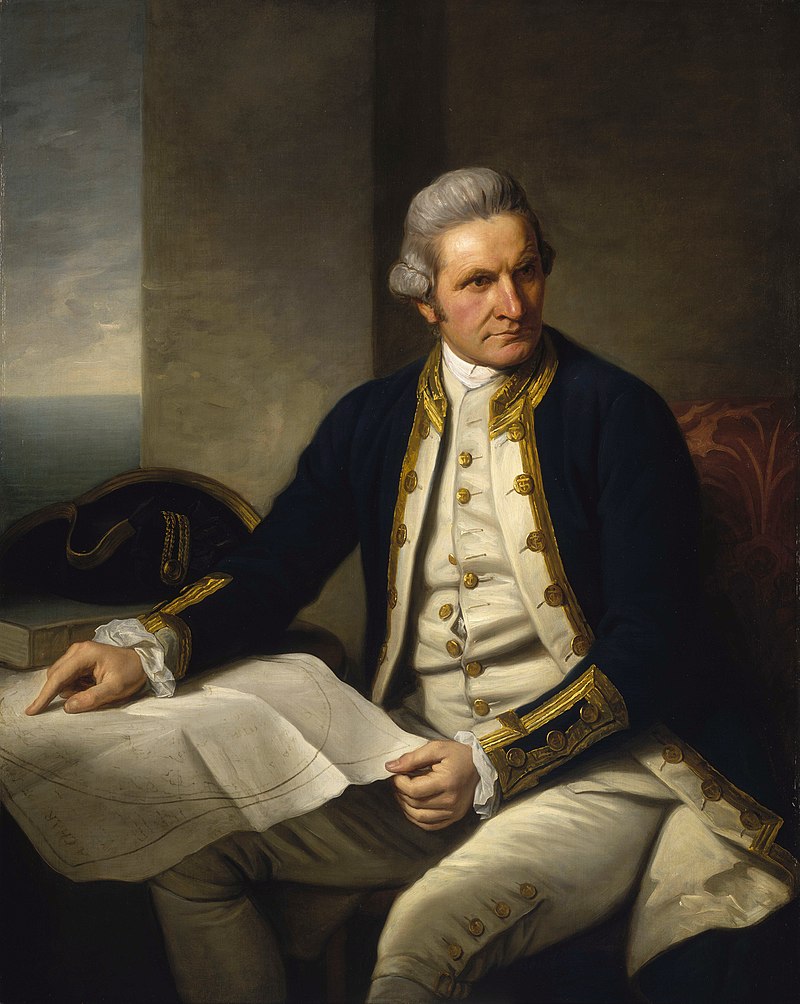
Captainjamescookportrait.jpg
Captain James Cook.
We learned in school that he was the first European to circumnavigate New Zealand, but what we didn't learn is that he was also one of the first people in the world to brew beer from malt extract.

Many brewers are suspicious of malt extracts, either because they think it's cheating (which it kind of is), or because they think it will make inferior beer.  Once upon a time that was true, too, but malt extract has come a long way over the years and the extracts available today will make excellent beers if used correctly.  This post is about the history of malt extracts.

Malt extract is made by taking the sugar extracted from malt during the mashing process and drying it, until it becomes either a syrup or a powder.  Some brands also contain hop extracts, so that the brewer doesn't need to purchase hops separately.  It is of course primarily used to make beer, but it is also used in cooking, and when I was a kid malt extract (without hops) was sold as a health food.  It was the '80s, when people were obsessed with health but somehow you could still get away with marketing concentrated sugar syrup as a health product.

In fact, malt extract does contain vitamins and minerals.  The British Navy was experimenting with malt extracts as early as 1772, trying to create an easily transportable concentrated malt to supplement sailors' diets and help prevent scurvy.  These first malt extracts were not a great success.  When Captain Cook took some on his second voyage to the Far East (1772 - 1775), his crew found that the beer they made with it had an unpleasant burnt taste.  However, it apparently improved when they added spruce leaves and molasses.  Eventually, the British Navy discovered that lemon juice was a more effective and less expensive way of preventing scurvy.

The trouble with early malt extracts was it took so long to boil away the excess water that by the time manufacturers produced a concentrated extract, the malt was burnt and unpalatable.  Technological advances in the late 19th century made it possible to boil the malt in a vacuum, which reduced the boiling time and created a better-tasting product.  At this stage malt extract was primarily a dietary supplement, but from the 1880s onwards British breweries began using it as a cheaper alternative to all-grain brewing.

The birth of modern extract brewing

Ironically, the glorious golden age of home brewing products we now enjoy began as a direct result of prohibition.  The kind of malt extract we're familiar with today, designed for the home brew market and often containing hops, was developed in the 1920s.  When the Volstead Act came into force American breweries could no longer legally produce beer, so they had to adapt, and one of the ways they did this was to produce malt extract instead.  Of course the extract could not be marketed as a home brewing product, so it was promoted as a baking ingredient.  This 1928 advertisement insists that Zobelein's Bohemian hop flavoured malt extract is a food product for use in cooking and baking.  Not for brewing at all.  Honestly.


Courtesy the Homestead Museum
Image from KCET.org

Customers knew perfectly well what the extract was really intended for.  Once you have malt syrup with hop flavouring conveniently added, you can make beer by simply adding water and yeast, and this clever innovation ensured that absolutely anybody could make their own beer.

Prohibition homebrew recipes tended to be a simple mixture of malt syrup, water, yeast, and sometimes corn sugar.  I'm hesitant to try one of these recipes because the results were often pretty horrible.    1920s malt extract was not as good as the extracts available today, and many Prohibition-era recipes didn't use it very well.

Malt extracts for craft brewing

The United States beer industry took a long time to recover from Prohibition.  Beer was produced commercially as soon as it became legal again, but the range of beers on offer was sharply reduced.  Beer enthusiasts who wanted styles that were no longer available were forced to make their own.

In New Zealand and Australia the primary reason for making home brew has historically been to save money, but like their American counterparts Antipodean brewers were also interested in making styles of beer that weren't available commercially.  Until recently the New Zealand and Australian commercial beer industries were decidedly basic, and anything more exotic than a lager or IPA could be difficult to get hold of.

Malt extract manufacturers responded to the increasingly sophisticated home brew market by developing more sophisticated products.  There is now a vast range of malt extract types available, and to some extent this has been enabled by the internet.  Thanks to Google it is easy to find recipes for any style of beer you like, as well as plenty of tips to help home brewers achieve good results whether they're using grain, malt extract, or a combination of both.

To paraphrase Leibniz, everything that is marketable demands to exist.

Saturday, 11 February 2017

Pseudo-Sumerian beer: the first experiment

Last year I made Sumerian beer, using a recipe from 1800 BCE.  It was good stuff, so I decided to try modernizing the recipe.  The aim of the game here isn't to recreate Sumerian beer, but to create a modern style that retains the characteristics of Sumerian beer while being more appealing to 21st century beer drinkers (i.e. me).  Mostly, that means carbonating it.  Last year's Sumerian beer was quite drinkable, but I would have preferred it to be carbonated and I would also have liked just a hint of hops.  The Sumerians didn't have hops, but I like them, especially the aromatic types like Tettnang and Cascade.


Pseudo-Sumerian beer


As you can see, the pseudo-Sumerian beer is a dark amber colour with a moderate head.  The taste is malty with a hint of caramel from the dates and some nice Amarillo top notes.  I chose Amarillo hops because they're not too overpowering and have a delicate citrus flavour that works well with dates, which were an important ingredient in Sumerian beer.  The hop flavour is not especially strong, but it's enough to cut through the sweetness of the malt and provide a bit of complexity.

Like the original Sumerian beer, this recipe uses barley malt, dates, and bappir.  Making bappir does take time and adds an extra step to the brewing process, but without it the beer wouldn't taste the same and you can make it ahead of time.  I described how I make bappir in this post - it's just malted barley, a little bit of spice, and some date honey mixed into a dough and then baked.

This batch came out at around 3% alcohol by volume, because I screwed up.  I hadn't used Black Rock malt before and didn't realise that you're supposed to use two cans for a 23 liter recipe, not just one.  However, there are occasions where you might want a low alcohol beer and this is a good choice.  It tastes much better than most of the light beers you can buy in Australasia.

Pseudo-Sumerian beer (PSB) recipe

500 grams bappir
250 ml date honey, which is dates that have been soaked in hot water and pureed - dried dates are fine and much cheaper than fresh ones
1 can Black Rock Amber liquid malt extract - please note that this should actually be two cans if you want a full strength beer
500 grams The Brew House light dried malt extract*
50 grams Amarillo hops, boiled for 1 hour
1 sachet dried ale yeast - you can get away with using bread yeast


The bappir needs to be mashed, but this is fairly simple.  You just crumble it into a ceramic casserole dish, cover it with boiling water, and leave it with the lid on for an hour.  Using a ceramic casserole dish keeps the heat in and thus helps extract the sugar from the bappir.

Strain the bappir mash into a 10 - 15 liter pot, then add three liters of hot water, both cans of amber malt extract, the date honey, and the dried malt extract.  Make sure the malt extracts are fully dissolved, then boil the wort until the protein break occurs and foam forms on top.  You'll also want to boil your hops while you prepare the wort.  After the wort has boiled you can strain the boiled hops into it, tip it into your fermenting barrel, top it up with cold water to make 23 liters (or 6 gallons if you're American), and pitch your yeast once it reaches the right temperature.

There are two key differences between this pseudo-Sumerian beer and real Sumerian beer.  One difference is the inclusion of hops, and the other is that I fermented my PSB a lot longer than the Sumerians probably did.  As I discussed in a previous post about Sumerian beer, I don't think the Sumerians used secondary fermentation.  They did not know how fermentation works, and may not even have understood the concept of secondary fermentation.  Since their brewing conditions would not have been very sanitary by 21st century standards, they may also have found it was unwise to leave their beer fermenting any longer than a couple of days.

Secondary fermentation starts to occur about three days into the fermentation process.  By then the yeast has consumed most of the sugar in the wort and has produced almost all the alcohol it's going to produce.  It then starts to metabolise more complex carbohydrates, which improves the taste of the beer and helps get rid of any off flavours.  Secondary fermentation is therefore an important part of the modern beer making process.  I left my pseudo-Sumerian beer to ferment for two weeks to ensure it got a secondary fermentation, then bottle conditioned it for a further two weeks.


* Feel free to substitute other brands of malt extract.  You just need an amber malt and a little light malt to supplement it. 

Monday, 5 December 2016

Commemorating 500 years of the Reinheitsgebot

2016 has been an eventful year, and at this point the one thing I think most of us can agree on is that we could do with a beer.  With that in mind, I'm sharing my recipe for traditional Bavarian style wheat beer.  I've been perfecting the recipe this year to commemorate the 500th anniversary of the Reinheitsgebot.


The Reinheitsgebot ("purity order" in German) is a piece of legislation adopted in Bavaria in 1516 that regulated what ingredients could be used in beer.  To some extent it was health and safety legislation, because in 1516 preventing beer from going off was a serious problem.  Brewers experimented with various additives in an attempt to increase their beers' shelf life, and unfortunately these additives were sometimes toxic.

The Reinheitsgebot stayed in force until 1987, when the EU rightly determined that it was an objectionable barrier to free trade, but its legacy still dominates the global beer market.  Most German beer is still brewed according to the Reinheitsgebot's specifications, and even here in Australasia most commercially produced beer complies with the purity order.  It has become part of the German beer tradition.

Originally the law required beer to contain only barley, water, and hops*, but German beer drinkers quickly found this list was too restrictive.  It effectively outlawed a number of traditional German beer styles that used different ingredients, including wheat beer.  So the list of permitted ingredients was expanded, and the first exception to be made was wheat.

My wheat beer recipe is a traditional Bavarian style, and doesn't comply with any version of the purity law because it contains honey and spices.  It isn't a historical recipe, in fact it's an extract recipe** rather than an all-grain recipe, but it tastes great.  It's a bold, full flavoured wheat beer with citrus top notes and smokey, honeyed undertones.

Ingredients

1.7 kg wheat liquid malt extract.  I use Mangrove Jack's Bavarian wheat, which already contains hops and has a packet of yeast under the lid so I do not need to buy these ingredients separately.
1 kg wheat beer enhancer
3 tbsp honey (approximately)
1 tsp coriander seeds, crushed slightly between your fingers to break them open
½ tsp ground nutmeg
½ tsp ground cloves

1 pack of carbonation drops for bottling – these are optional.  You can just use sugar or glucose syrup, but the carbonation drops are easier and more convenient.  I recommend them.

This recipe will give you 23 liters of beer, or 6 US gallons.

Instructions

The secret to brewing good beer with malt extract is to ignore the instructions on the side of the malt tin.  Instead, bring 3 liters of water to the boil, then add malt, beer enhancer, and spices.  Stir until everything is completely dissolved.  Boil the wort, stirring regularly, until the protein break occurs and foamy white stuff starts to form on the surface.  Once the protein break has occurred you can take the pot off the heat and leave it to cool for a while.

While the wort cools you can clean and assemble your fermentation bucket, and re-hydrate the packet of yeast that came with the malt extract by putting it in a bowl of warm water with a little sugar.  Pour four or five liters of cold water into the fermentation bucket, then add the wort.  Add more cold water until you have 23 liters of wort in the fermentation bucket.

Pitch the yeast when the wort reaches somewhere around 20 degrees Celsius  (18 to 23 degrees is apparently the optimal temperature range for ale yeasts), and ferment the stuff for two weeks.   I find fermentation can be a little slow to start with this recipe, but it should start within 12 hours.  As long as there's a kraeuzen on the top it'll be fine.

After two weeks the beer is ready to be bottled, and it should be conditioned in the bottles for at least two weeks.  Four weeks, however, is ideal.  If you drink it earlier it's likely to taste slightly "green".


*  Remember, this was over 300 years before Louis Pasteur.  They did not yet understand the role yeast plays in fermentation.
**  At some point in the future I'll do a post on the history of malt extracts.  It's more interesting than you might expect.

Sunday, 21 August 2016

Homeric kykeon

Kykeon (κυκεών in Greek) is a drink made from barley, herbs, and sometimes wine.  It was a popular everyday drink in Classical Greece, although it was considered a bit low-class.  There are a couple of different recipes for kykeon in ancient Greek texts, because it was mentioned in Greek mythology.  

This is undoubtedly one of the weirdest things I've ever consumed.  What's that white stuff in it, you ask?  Grated cheese, of course.


Kykeon made with barley and pennyroyal was a central component of the Eleusinian mysteries.  According to mythology the goddess Demeter consumed this drink to ease her grief at losing her daughter; pennyroyal can be used as a mild sedative.  During the Eleusinian religious festival humans consumed kykeon as part of the initiation process.  This kykeon obviously had some special additives not usually present in everyday versions of the drink, because the Eleusinian initiates' experiences show that it was psychoactive.  It's often suggested that Eleusinian kykeon may have contained ergot, but there are other psychoactive ingredients that were available in ancient Greece and could have been used.  

In the Iliad 
(XI, 638–641) and the Odysssey (X, 234), kykeon was made with wine and grated goat cheese as well as barley.  In the Iliad kykeon is served to Nestor and his companions, and in the Odyssey Circe gives it to Odysseus' men.  Of course, Circe's kykeon contains a drug which incapacitates the sailors and allows her to turn them into boars.  Some scholars probably interpret Circe's potion as a hallucinogen, but personally I don't see a need to rationalise the story into something that could have actually happened.

My kykeon is the Homeric kind, made with wine, and it most definitely doesn't contain ergot.  I like to think I'm a reasonably adventurous eater, but I have my limits.  

People who have made kykeon attest that the way to do it is to put all the ingredients in a pot and stir them together over a heat source, so that's what I did.  I cooked wine and barley flour on a low heat until the mixture thickened up, then I grated goat cheese over the top.  The cheese didn't melt, because goats' milk has a different protein structure to cows' milk and won't melt no matter what you do with it, but it did break apart into particles that mixed in with the kykeon.

The result was surprisingly palatable.  It smelled really good while it was cooking, and tasted mostly of wine with a little sweetness from the barley.  The grated cheese seems weird, but in fact it was quite good.


The Challenge: Myths and legends.


The Recipe: Wine and barley flour simmered together for 10 minutes, with grated cheese on top.

The Date/Year and Region: The Homeric epics were written down in the 8th or 7th century BCE, but they are set in the Late Bronze Age.  It's possible that the recipe dates back to the Late Bronze Age and I'm inclined to think it probably does, because the Iliad gives the recipe along with a very accurate and detailed description of Mycenaean furniture, but it's impossible to know for sure.

How Did You Make It: I put everything in a pot and simmered it for 10 minutes, stirring constantly.

Time to Complete: Ten minutes.

Total Cost: All the ingredients were ones I already had on hand in my kitchen.

How Successful Was It? While it's definitely a strange concoction by 21st century standards, it wasn't at all unpleasant. 

How Accurate Is It? I cheated by using an electric stove and stainless steel saucepan.  Other than that, I followed the recipe in the Iliad, but it's difficult to say how closely my kykeon resembles the original in terms of consistency and flavour.  The Homeric epics specifically state Pramnian wine was used to make kykeon, so I chose a rich, dark, relatively sweet wine (Peter Yealand's 2014 Merlot - it's a nice wine and I recommend it), because apparently that's what Pramnian wine was like.

Saturday, 23 April 2016

Mock food in the South Pacific

This fortnight's Historical Food Challenge is Mock Foods - "Historic cookbooks are full of recipes meant to imitate rare, expensive or impractical ingredients. It’s your turn to help your food pretend it’s something that it isn’t!"

New Zealand is geographically isolated.  Historically, many foods from overseas weren't available here, or were expensive.  That's still true to some extent, and it seemed appropriate to make a distinctly Kiwi entry for Mock Foods.  So what unobtainable delicacy will I be imitating in this blog post?  Turtle?  Caviar?  Nope.  This is New Zealand we're talking about here.  I'll be making imitation processed cheese.

Rex Luncheon Cheese was an Australian processed cheese product sold in cans.  Apparently it was popular but expensive, and it may have been difficult to get hold of in more isolated parts of the country.  So Kiwi housewives figured out how to make imitation Rex Cheese at home.


Advertisement for Rex Luncheon Cheese printed in The Age, 12 June 1925.


Recipes for imitation Rex Cheese began to appear in the 1920s.  This one is from The New Zealand Truth, 18 September 1930, and seems to be fairly representative of its type*.  It involves cheese, egg, vinegar, mustard, and cayenne pepper.  Advertisements described Rex Cheese as "piquant", which was apparently the product's point of difference and gave it a competitive edge over other canned cheese products.

The recipe is easy to make; you just put all the ingredients in a saucepan and stir until thick.  You have to stir constantly and vigorously, because it tends to curdle a bit like scrambled eggs.  This is actually the mixture starting to thicken up.  The "curds" are soft, and if you stir vigorously enough you'll get a thick and reasonably smooth consistency, but it looks like it's going to be a horrible disaster and it doesn't smell all that wonderful either.  I spent the whole cooking process looking at this stuff in horror and thinking "should it be doing that?  Ye gods, I think it is supposed to do that!"


Imitation Rex Luncheon Cheese.  I just love the gloriously artificial-looking orange colour.   In fact that's from the egg yolks, there's no colouring in there at all.


The recipe I used was intended as a filling for pastries, but the traditional way to serve imitation Rex Cheese is in cheese rolls.  These savoury snacks, sometimes called the sushi of the South, are a regional dish from Otago and Southland that you don't often see here in the North Island.  And that's a shame, because they are delicious in the way that only cheese-based junk food can be.  Of course, modern cheese roll recipes don't use imitation Rex Cheese.  They use a completely different cheese filling, and while I waited for my cheese rolls to toast I was uneasily aware that there might be a good reason for that.


Cheese rolls made with imitation Rex Luncheon Cheese.  They certainly look like they're made with processed cheese, but were they edible?  Read on to find out.


The Challenge: Mock Foods.

The Recipe: This one.

The Date/Year and Region: 1930s New Zealand.

How Did You Make It: As per the recipe.

Time to Complete:  25 minutes.

Total Cost: I didn't need to buy anything for this challenge because I already had the ingredients on hand.

How Successful Was It?  If there's one thing even less appealing than Depression-era canned cheese, it would have to be imitation Depression-era canned cheese.   But to my great surprise, the imitation Rex Cheese tasted okay.  It was cheesy and savoury and, yes, piquant.  It also held together and didn't ooze out of the cheese rolls when I toasted them, which was good.  In fact my only complaint is that the recipe has too much mustard.   If you make this recipe, I suggest you halve the amount of mustard.  In all honesty however, there are better cheese roll recipes out there.

How Accurate Is It? Well, I followed the recipe and I think it did turn out the way it was supposed to.   I'd love to know what Rex Cheese was really like and whether this recipe was a convincing imitation, but, sadly, Rex Luncheon Cheese is not available today.  The company that produced it no longer exists.

The consistency of my imitation cheese was more like a thick custard than any cheese product I've ever encountered, and I find it hard to believe the texture of this ersatz recipe was anything like the texture of real Rex Cheese, but then again we know Rex Cheese was spreadable and could be purchased in jars, so maybe this version isn't so far off after all.  Presumably the taste was at least reasonably similar.


* Although the recipe doesn't specifically mention Rex Cheese, its ingredients and preparation appear to be typical of imitation Rex Cheese recipes.  Compare it with this recipe provided by the Otago Daily Times, which was published in 1984 and is therefore ineligible for Historical Food Fortnightly challenges.