Showing posts with label HSF. Show all posts

Sunday, 28 December 2014

Flinderhaube

You know how it goes.  You see these things on the internet and you just have to make one.  You know you're going to wish you hadn't, but you can't help yourself.

I saw this recently:

Georg Pencz, Portrait of a Lady, c1540, image from here.
It's a flinderhaube, a hat covered in sequins (flinderlein) which was fashionable in the 16th century in what is now Germany.  It's absolutely perfect for the last Historical Sew Fortnightly challenge of 2014, All that Glitters.

As it turned out, drafting the pattern was a bit of a challenge.  Flinderhauben could be made with netting, like this one, but I think my Georg Pencz example is made out of cloth.  I tried a number of different ideas for the pattern, but I found I got the best shape using the goldhaube pattern developed by Genoveva von Lubeck, which she has very kindly made available here.  I've made a couple of alterations to get the same look as in the picture, but only small ones.

There are a lot of different flinderhaube shapes shown in paintings, so I think there may have been quite a range of different patterns in use.

Anyway, this is what I ended up with:


I think it's better photographed with a flash, which shows up the shot silk and makes the flinderlein glitter properly.  These things must have looked pretty spectacular in the sun or by candlelight.


The Challenge: All that Glitters.

Fabric: Half a yard of pink and gold shot silk, and the same of red linen for lining it.

Pattern: Genoveva von Lubeck's goldhaube pattern.

Year: 1540 or thereabouts.

Notions: Lots of little gold teardrop shaped sequins, glass pearls, and some gold thread.

How historically accurate is it?  The fabrics and sewing are probably okay, and the pattern is a very well researched one.  However, budget constraints meant that I used glass imitation pearls and synthetic gold thread.  I think they actually did have glass pearls at this time, but they wouldn't have looked like these ones.

It does need more flinderlein and I may add some more at some point, but right now this will just have to do because I've had enough of sewing flinderlein on this thing.

Hours to complete: Maybe 15 - 20?  I didn't really keep track.

First worn: Today, for photos.

Total cost: All up, about $45.

Thursday, 11 December 2014

Modern history

So there's this Poiret pattern I'd been meaning to make for ages, and HSF Challenge 23 is Modern History.   This means garments that are historical, or based on historical garments, but are wearable in a modern context.  I think this is a great idea for a challenge, not least because I want some new work clothes.  I realize making a pattern from the 1920s is a very obvious way to approach this concept, but sometimes things are popular for a reason.


The pattern is reproduced in The Cut of Women's Clothes: 1600-1930 and was originally a dress, but because I don't wear dresses I removed the skirt and made it into a top.  The original looked like this:


The Challenge: Modern History.

Fabric: A bit over a meter of cotton/synthetic blend from a Fabric Warehouse sale.

Pattern: Diagram LXXI from Norah Waugh's The Cut of Women's Clothes: 1600-1930.

Year: 1922.

Notions: N/A.

How historically accurate is it?  Removing the skirt was the only change I made to the pattern, but obviously the pattern is not 100% accurate as a result, and the cotton/synthetic blend fabric would not have been available in the '20s.  I suspect my sewing techniques aren't very accurate either.  But then, what do you expect with a cheap knock-off?

Hours to complete: Around 4.  A lot of it is hand-sewn.

First worn: Today, to work.  It makes a lovely work shirt and is also suitable for parties.

Total cost: I think the fabric was $5/meter, so about $7.

Sunday, 30 November 2014

The banyan

It's finished.  While I can't say this was an easy project, the result is very rewarding.  In fact, the main reason for the frustrations and problems I've had with this project is simply that I haven't made anything like it before.  If I did it again, it would probably be easier.

The fact that it's finished already is thanks to Fabric.com's stunningly quick shipping.  I had to order some more paisley, and to my absolute amazement it turned up in just a few days.  Standard shipping too.


In some ways this was a good choice for my first ever coat, because in structural terms the banyan is fairly simple.  I used thin cotton sleeve heads and interlined the collar and cuffs, but otherwise there's not much to it.  The original that inspired me doesn't look overly structured either, and I know early banyans weren't structured like a frock coat.


I've learned a few things making this pattern:

  • Making a coat is a lot like writing SAS code.  It has to be done step-by-step, and the steps have to go in the right order.
  • Yards are not meters.  I know that yards are not quite as long as meters, so I reasoned four yards should be a bit under four meters - plenty for a coat.  Wrong.  Four yards is three meters.  Not enough for a coat when the fabric is only a meter wide and has a directional print that runs across the fabric instead of vertically.
  • Early 19th century coats can be really flattering.


The Challenge: Gentlemen.

Fabric: 4 and a half yards of Kaffe Fassett "Paisley Jungle" printed cotton.  This is intended as a quilting fabric, but I don't think Mr. Fassett would mind.

Pattern: This one, with some modifications to make it look like this.

Year: Mid 19th century.

Notions: Silk thread in black and cream.

How historically accurate is it?  I'm not entirely sure, because I have no experience with this time period.  The original is made of printed cotton and this one is printed cotton too, but in terms of historical accuracy I'd say this fabric is really pushing it.  While the original appears to be self-lined, mine is lined in plain cream-coloured cotton, something I've seen on other mid-19th century garments.  Apart from the fact that my banyan is machine-sewn where possible, I think the construction is probably mostly okay.

Hours to complete: Oh God, I don't want to think about that.  There were a lot of hours.

First worn: For fittings.  It's a bit too hot for this time of year, but come winter I think it'll get a lot of wear.

Total cost: Somewhere around $50 - $60.


Monday, 24 November 2014

Why I don't do 19th century

Ever since July I've been having an on-again off-again fight with a 19th century banyan pattern.  It was supposed to be done for HSF Challenge 14: Paisley and Plaid, because I saw one on the Dreamstress' Pinterest board and decided I absolutely had to have a paisley banyan.  I rather fancy myself as the sort of chap who wears a paisley banyan.  Now I get another chance to finish the wretched thing as the theme for Challenge 22 is Gentlemen, and it will be late again, because I had to order more fabric.  Turns out four yards is not enough for a banyan.  Thankfully, fabric.com still has the fabric in stock.  Whew!

Anyway, I'm determined to get the thing finished at some point, because it's actually showing a lot of promise.  Quite apart from the fact that it's psychedelic paisley, it fits well through the back and sides with virtually no alteration to the original pattern.  This is a novelty - clothes never fit me properly, but this coat has a nice line in back and disguises what a weird shape I am.  It doesn't quite hide the lumpy bits in front, but it's a coat after all, not a magic wand.

In fact my arse is quite large, but this thing makes me look much better proportioned.

I used this pattern as the basis for my banyan.  It's about half a century earlier than the example I'm working from and needed substantial alterations to the collar and front (and some small cosmetic adjustments to the sleeves), but the basic shape is quite similar to what I want to make.  By happy accident it turned out to be a good size for me, once I scaled it up to a 5 cm grid.

Drafting cuffs and a shawl collar like the one in the inspiration photo was pretty easy too.

Unfortunately after that everything went a bit pear shaped.  There are no words in the English language to adequately express how much I hate 19th century sleeves.  I spent hours fighting with these things, trying to make them sit right.  Of course, those of you who have done 19th century before are looking at the photo and sniggering, because you know what I did wrong.  I lined the seams up incorrectly.  Of course, then I had to unpick the damn things again, because I was only checking the fit and my cotton mock-up doubles as a lining.  Now I have to install the sleeves for realsies.  Yay.

Sleeve problem.

Thursday, 30 October 2014

The side-pleated skirt is finished

Here is my entry for HSF challenge 20: Alternative Universe.  This is an alternative to the pattern proposed by Bernice Jones in her 2012 article The Construction and Significance of the Minoan Side-Pleated Skirt, featured in the latest Aegaeum book.  To recap my thinking on this, I hypothesize that there were two methods of making side-pleated skirts: one way is a tube of fabric pleated and tied at the waist as Dr. Jones has described, and the other is the two piece pattern I've used, which is essentially an A-line skirt with what we would now call organ pleats up each side.

The reason I think there were two patterns in use is that there are two different skirt shapes depicted in Minoan art.  Some skirts are clearly tubular like the one Dr. Jones reconstructed, while others appear to be fitted at the waist.

So did my pattern work?

Overall, I think it was reasonably successful.  Here it is from the side, showing the side pleats:

My pleats are held together at the waist with two little ties.

And here it is from the front.  As you can see, it could use an underskirt to help it keep its shape:


It does, however, have the flat, A-line shape that we see in Minoan art.  Here's my inspiration picture again for comparison:

Bronze female figure Cretan Late Minoan I 1600-1450 BCE Metropolitan Museum
Late Minoan bronze figure, image from Pinterest.

I think my pattern does a pretty good job of replicating the sculpture's skirt, but of course I'm biased.

Like the original, my reconstruction sits slightly south of the dummy's natural waist (though you can't really tell with the loose heanos underneath), and I found this was really helpful in terms of getting the thing on and off.  The original has no visible closure, but it would be easy to conceal a slit in one of the pleats and the ties holding it shut would be hidden under the belt.

Speaking of the belt, I've photographed mine with a strip of wool tied around it to emulate the rolled belt Minoans wore with their side-pleated skirts:


What would I do differently in future?

If I was making this skirt again I would make the side pleats deeper - probably 10cm instead of 5cm.  As I mentioned before, the skirt also needs more structure.  This could be done by wearing it over an underskirt, but if it was made of heavier, stiffer fabric an underskirt might not be necessary.  I don't think it would need a boned undergarment like a farthingale or panniers.


The Challenge: Alternate Universe

Fabric: 2.5 meters of purple coat-weight wool.

Pattern: I drafted it myself based on various Minoan bronze and clay figurines.

Year: 1600 to 1450 BCE.

Notions: Linen thread.

How historically accurate is it?  As this is a speculative reconstruction, it's hard to say.  It's reasonable to assume the original was made from wool and of course it would have been hand-sewn, but otherwise there isn't a lot to go on.  My fabric is machine-woven, but I doubt it's all that different from Minoan fabrics.

There's no way of knowing whether the colour I chose is appropriate for one of these skirts.  I chose it because I like it, and because the Minoans liked purple too.  Purple cloth was apparently being produced on an industrial scale in Minoan times*, so purple cloth would have been available.  However, this garment had ceremonial significance and it's possible there were rules about what colour it should be.

Hours to complete: About 5 hours.

First worn: Directly after pleating it, to see how it drapes.

Total cost: $52.


* Apostolakou, V. et al,  2012, ‘The Minoan Settlement on Chryssi and its Murex Dye Industry’ in Kosmos pp 179-182
Barber, E. 1991, Prehistoric Textiles.
Brogan, T.M. et al, 2012, ‘The Purple Dye Industry of Eastern Crete’ in Kosmos pp 187-192

Saturday, 18 October 2014

A late entry

This is the kind of project you do when you're avoiding something else - in this case setting sleeves.  I hate setting sleeves, especially those two-part 19th century jobs where the sleeve head is never the same shape as the armhole.  So instead of spending at most half an hour setting sleeves, I spent four hours making a piece of Neolithic linen textile.


I'm entering this one for HSF Challenge 13: Under $10, which I didn't manage to make anything for at the time.  Of course, Challenge 13 was due in July, but better late than never, right?  I did actually start a piece of twined cloth for Challenge 13, but the timing didn't work out.

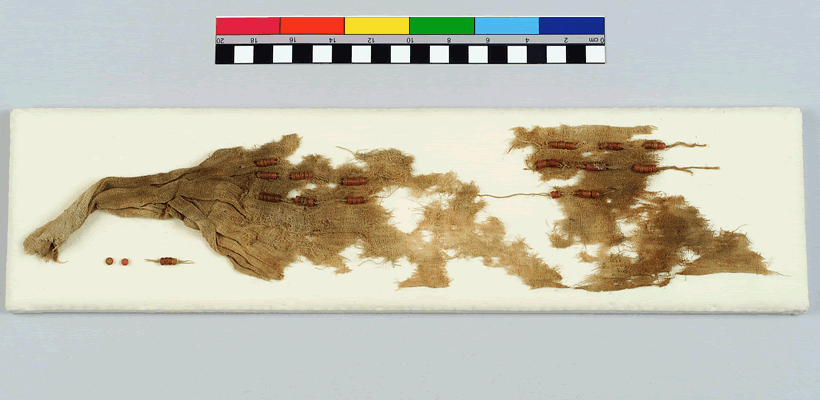
Fragments of textile like this were found at Nahal Hemar in Israel, in 1983.  They date from the Neolithic, before the invention of pottery, and they are not woven the way cloth is woven today.  Instead, the linen warp and weft threads are twined together; the people who made these 8500-year-old textiles had not yet invented weaving as we know it today.  However, there was nothing coarse or primitive about the Nahal Hemar textiles.  This tiny scrap of fabric is only 5.5 by 7.5 cm.

פיסה אריג
 צלם:עמית קלרה
Scrap of fabric from Nahal Hemar.  Picture found here.

In Prehistoric Textiles, Elizabeth Barber has a section on the Nahal Hemar textiles and diagrams showing how they were made.  The weft threads are twisted around each individual warp thread, and the result is a sturdy, net-like fabric.  I've made the selvage by wrapping the warp ends in thread, which seems to have been how the Nahal Hemar pieces were finished.

Here is my piece in close up:


The Challenge: Under $10.

Fabric: It is fabric.

Pattern: N/A.

Year: Around 6500 BCE.

Notions: None.

How historically accurate is it?  The technique is fine, and the original Nahar Hemal textiles are made of linen.  While my fabric is not as fine as the example I included in this post, I think it's within the general ballpark in terms of thread diameter.  So maybe 9/10.

Hours to complete: About 4.

First worn: N/A.

Total cost: Virtually none.  I don't remember how much I originally paid for the big spool of linen warp I used to make the piece, but the few meters of linen would cost only a few cents.

Sunday, 12 October 2014

With thanks to Catherine Raymond

Historical Sew Fortnightly Challenge 19 is HSF inspiration.  It's an excellent theme, but it was very hard for me to decide what to do because I was spoiled for choice.  There are so many HSF people making so many awesome things.

In the end I took my inspiration from blogger and HSF participant Catherine Raymond.  Catherine has made some stunning projects for this year's HSF, and in this case I'm thinking particularly of her Roman earrings for Challenge 7 and the Egyptian bag tunic she made for Challenge 9.

I decided to try making jewellery, and since I've never made anything Egyptian before I thought this would be a great opportunity to try something Egyptian.  I made a beaded headband of the type that was popular in New Kingdom Egypt.  Mine is based on an 18th Dynasty tomb painting showing a lady named Tjepu.


I couldn't find any existing examples of this type of headband, so I had to work out a plausible way to reconstruct it based on examples of ancient Egyptian beadwork that do survive.  Yes, there is an ancient Egyptian headband in the Petrie Museum, but it is a completely different style to Lady Tjepu's band and is constructed differently.  So, instead, I looked at other beaded items like this dress from Qau to see how the beading might have been done.

The Petrie Museum has an excellent handout titled Textiles in the Petrie Museum, available here, with instructions for making a number of ancient Egyptian garments including the beaded dress.  It's done with peyote stitch.  And how do I know about Textiles in the Petrie Museum?  Well, that's thanks once again to Catherine Raymond, who posted the link on her blog a while back.

Armed with this knowledge I used peyote stitch and size 8 seed beads to make my headband, and can confirm that the peyote stitch worked well for me.  I found I needed to use a combination of one- and two-drop peyote stitch to get the pattern looking right.  I've seen this combination on ancient Egyptian beadwork, so I'm confident it is an acceptable period method.


My version of Lady Tjepu's headband ties around the head with a plied linen cord.  This is an educated guess on my part since I couldn't track down any indication of how these headbands were attached.  Plied cords are easy to make and were extremely common in ancient Egypt, where they were used for all kinds of purposes.  The cord was easy to stitch unobtrusively to the top of the headband, using the ends of the tread I used to stitch the beads.

The Challenge: HSF Inspiration

Fabric: None.

Pattern: I drafted it myself based on the painting of Lady Tjepu.

Year: 1390 to 1353 BCE.

Notions: Glass beads and linen thread.

How historically accurate is it?  The beads are plausible colours and a plausible size, but I imagine they are probably a different chemical composition to ancient Egyptian glass.  I'd give this one 9/10, because it is as good as it's going to get with modern materials.

Hours to complete: About 6 hours.

First worn: To check the size.

Total cost: $16.

Thursday, 25 September 2014

Hera's veil

HSF challenge 18 is Poetry in Motion, and when I think poetry I automatically think Homer.  In this case I'm thinking of the passage from book XIV of the Iliad where Hera is getting dressed up for the night so she can pull a fast one on Zeus.  She completes her ensemble with a newly made white veil that shines like the sun:

κρηδέμνῳ δ' ἐφύπερθε καλύψατο δῖα θεάων
καλῷ νηγατέῳ: λευκὸν δ' ἦν ἠέλιος ὥς
          -Iliad, book XIV


Nice and transparent, just like the Akrotiri picture.


To figure out what a Bronze Age Greek veil might look like, I used the veiled dancer fresco from Akrotiri.  The fact that the Iliad was written down in its current form almost a thousand years after the Akrotiri frescoes were painted isn't actually a problem, because the Iliad is set in the Bronze Age and contains plenty of Bronze Age elements.  For example, warriors in the Iliad have massive tower-like shields which were long since obsolete by the time the poem was written down, and these tower shields are shown in the Akrotiri frescoes.

Veiled virgin:73 x 100 = 300 euro
The picture I based my veil on.  Image found here.

The Akrotiri veil is yellow, of course, while Hera's is white.  This isn't surprising - yellow wouldn't be appropriate for Hera.  Yellow was associated with unmarried women in ancient Greece, and Hera is (among other things) the goddess of marriage.  I did keep the blue borders at each end and the little carnelian beads, because a plain white rectangle is boring, but I had to guess at the size of the veil.  I settled on 200 centimeters by 90 centimeters based on the fresco.

The stripes at each end of the veil could either have been woven into the fabric, or stitched on.  I tend to think they represent a decorative band that was separate from the main fabric and stitched into place, which seems to have been a common way of decorating Minoan and Mycenaean clothes.  Allow me to refer you to my previous blog post, where I talk about weaving a sample of decorative band from Tyrins.

I didn't weave bands for Hera's veil.  I was already intending to sew some 300 carnelian beads onto it and was uneasily aware that I wouldn't enjoy the process.  Instead I stitched two stripes of blue silk taffeta to the ends of the veil.  You do often get plain bands in a contrasting colour, especially in Mycenaean art.

When I sewed the bands on I made a really interesting discovery: the blue silk is stiffer than the white gauze, and it holds out the ends of the veil when they hang down.  Without this stiff edging the fabric would just bunch up.  This is exactly what we see in the picture from Akrotiri, and is another reason why I think the picture shows separate cloth bands stitched to the ends of the veil.

HSF details...

The Challenge: Poetry in Motion

Fabric: Two meters of white silk gauze and scraps of the same blue silk taffeta I used on the Akrotiri dress.  See this previous post for a summary of evidence for silk use in the Bronze Age Aegean.

Pattern: None.  It's a rectangle.

Year: The Iliad isn't set in a specific year, but the Akrotiri fresco I based the veil on dates from 1650 to 1550 BCE.

Notions: Silk thread and lots of 3mm carnelian beads.

How historically accurate is it?  Well, it probably isn't too bad, although the silk comes from a different type of moth to the ones they had in the Aegean.  One thing that's almost certainly not accurate is the small rolled hems along each side.  The original would have been woven to the desired width, but the selvages of my silk were very clearly the product of a modern jet loom and at least little rolled hems are plausible for the period.

Hours to complete: Maybe 8 or so.  I lost count.

First worn: In front of the mirror to see how it draped.  I can neither confirm nor deny that I made a tit of myself posing like the Akrotiri girl during this process.

Total cost: I think about $32.  I can't remember how much the beads were, but I think they were somewhere around $12. 

Wednesday, 10 September 2014

The infamous pineapple


HSF challenge number 17 is Yellow, and it was probably inevitable that at least one of us would knit a pineapple bag.  Reticules knitted to look like pineapples were a popular 19th century accessory and are well known among the historical costuming crowd.  What may be less well known is that there is a nice, modernised version of an original 1860s pattern available here.

The writer of said pattern, Franklin Habit, has this to say about the pineapple: “I knew with sick certainty that I would have to make one”.  See, this guy gets me.  I felt exactly the same way about it.  But once I’d deciphered the abbreviations, I found the pattern is actually very simple.  All it requires is a bit of manual dexterity and the ability to count.  It’s fun, and even weirdly addictive.

The original pattern called for four shades of green and four shades of yellow yarn, but as Mr. Habit correctly observes wool doesn’t come in that many shades these days.  Not a problem.  I wasn't planning on buying wool anyway because I already had some white lace weight wool lurking around at home.  I dyed skeins of wool in brownish-green, emerald, and yellowy green.  Didn’t like any of them.  Overdyed them with green.  Still didn’t like them.  Overdyed them again with blue.  Finally, I had three similar shades of green that I quite liked.  That took care of the leaves, but there was none left for the bottom of the bag so I had to make up another dye batch when I got to the bottom.

Being lazy, I didn’t make four shades of each colour.  The yellow is all one colour, but I made it variegated because I thought that would look more lifelike.  It’s fair to say the variegated dye effect didn’t come out quite how I would have liked, but it’s okay and it is a nice sunshiny yellow.

I dyed my wool using food colouring.  It’s essentially the same thing as the acid dyes you can buy to use on wool (and other protein fibers).  The main difference is price.  Do your research and don’t be fooled into buying something you might already have in your kitchen cupboard.


HSF details as follows...

The Challenge: Yellow

Fabric: Lace weight wool, plus a scrap of yellow silk for the lining.

Pattern: Franklin Habit's pineapple pattern, available here.  I made mine a bit smaller than Franklin's; this is easy to do because the pattern is just a 16 stitch repeat.  Any multiple of 16 stitches will get the job done.  However, Franklin and I have different interpretations of the pattern, which says to put a drawstring "at the termination of the top leaves".  Franklin puts his drawstring at the top of the leaves, while I put mine at the base of the leaves where they attach to the fruit.  This is purely a matter of personal taste.

Year: 1860s.

Notions: The pattern gives instructions for beading the bag if you want to, but I didn't.

How historically accurate is it?  Not bad at all.  Perhaps 9/10.

Hours to complete: No idea.  I did it on the train in the mornings.  Wellington must be the only city in the world where you can knit a pineapple in public without anyone even seeming to notice.

First worn: Not really applicable.

Total cost: $9 for a set of needles.

Tuesday, 2 September 2014

Reconstructing a possible Minoan silk dress

Last time I posted, I talked about evidence for silk in the Bronze Age Aegean.  I thought it would be interesting to see what a Minoan style silk dress looks like, and by happy accident I can make it fit the most recent Historical Sew Fortnightly challenge: Terminology.  This challenge is about picking a term defined in Leimomi's big glossary of historical textile terms and making something with it.  Now, I wanted to take a modern fabric term that we use today, and see how it relates to the kind of fabrics we see on the Akrotiri frescoes.

"Gauze" is the term I'm going with here.  That's because I want to try copying this:


"The Necklace Swinger," girl age 16 - 18 in procession
Image found here.

Like the veil I talked about in the last post, this dress is made of a very fine, sheer fabric that may have been silk.  Alternatively, the picture may represent very fine linen.  I've never seen linen that fine, so off I went to The Fabric Store and bought two meters of the finest silk gauze I could find.

This style of dress was called a heanos by the Mycenaeans.  I've seen people describe it as a blouse, but it was a full-length garment.  Look carefully at the bottom of that picture and you will see it peeking out underneath her kilt.  This heanos is a bit unusual in that it's loose and doesn't have the shoulder seam covered by a decorative band you see in most cases - here's a good example of what they usually look like:


Typical figure-hugging heanos with shoulder seam.  Image from here.

They are the same type of garment, but they're clearly made differently, using different fabrics.  I would guess that the first one is a loose fit for practical reasons.  The heanos was T-shaped and made from two pieces of cloth with a single long, curved side seam under each arm.  Because this seam is cut on the bias it stretches, and if the heanos is close-fitting it needs to be fairly strong.  I suggest the fine, gauzy fabric of the blue heanos wasn't strong enough to be made into a tight garment.  The threads are clearly delicate, and if it was an open weave the structure may not have been very stable.

So how does my reconstruction compare to the picture?  Well, here it is with a kilt:


The kilt was made for one of 2013's Historical Sew Fortnightly challenges.


And here's how my gauze compares with the original:


That's definitely the same level of transparency we can see in the Akrotiri fresco.  Of course, the fresco is a stylized painting and not a photograph, but it doesn't surprise me that the Minoans could produce fabric as fine as what we have today.  Highly sophisticated textiles have been produced in Europe since the Neolithic and like Egyptian art from the same period, Minoan art is considered to be quite reliable in terms of showing us what kind of clothes Minoan people wore.  The difficulty with Minoan art lies in determining whether it shows everyday clothes, or clothes worn on specific occasions by specific people.

Here's the heanos without the kilt:


HSF details as follows:

The Challenge: Terminology

Fabric: Two meters of silk gauze, plus silk taffeta scraps for the decorative edging.

Pattern: I've used the heanos pattern developed by Bernice Jones (see New Reconstructions of the "Mykenaia" and a Seated Woman from Mycenae in the American Journal of Archaeology, July 2009).  I've adapted Dr. Jones' pattern to make a loose fitting heanos without a shoulder seam.

Year: 1650 - 1550 BCE.

Notions: Silk thread and two tassels made from rayon.  I didn't have any appropriate silk and I can always swap them out for silk ones later.

How historically accurate is it?  It's as accurate as I could get it, but there are some problems there.  For starters this is silk from the Bombyx mori moth.  If the original was made of silk it would have come from a moth in the Saturnia genus -  what we now call wild silk or tussah silk.  We don't, of course, know if the original was silk.  It may have been linen.  As I said, the sleeve tassels are rayon.

Inevitably, there's a certain amount of conjecture involved in reconstructing something like this.  We can never know for sure exactly how close my reconstruction is to the original.

Hours to complete: Maybe 8 or so.  I'm neither especially quick nor especially good at hand sewing.

First worn: Lots of times for fitting and refining the pattern.

Total cost: $44.

Wednesday, 13 August 2014

The Mongolian mystery hat

[UPDATE] Many thanks to Jeanette Murray from the Historical Sew Fortnightly Facebook group, who informed me this style of hat is known as a toortsog!


My hat


// Mongolian Hat. National Museum ofCopenhagen. Denmark
The original hat as shown on Pinterest


I saw the original hat on Pinterest.  It was tagged as 16th century and said to be in the Copenhagen Museum, but I haven’t been able to find it on their website.  Still, I’m pretty sure it is pre-1945 and therefore fair game for the Historical Sew Fortnightly, and I don’t have any doubts that it comes from somewhere in Central Asia.  I’ve seen similar looking Mongolian hats in pictures going back to the 14th century - see here or here, for example, or here.

This is my entry for HSF challenge 15: The Great Outdoors, because you don’t get much more “great outdoorsy” than Mongolia.

Despite having only one unreferenced photo to go on, I reckoned I could recreate the hat anyway.  It appears to involve six triangular panels that are rounded at the bottom.  These are sewn up into a cone, and then the lower edge of said cone is folded back to create the brim.  The grain of the fur looks like it goes toward the point of the cone, and it seems to sit better on the head that way, so that’s how I cut the fur.  The fur comes from an old coat which I suspect is made from rabbit pretending to be mink.  It was badly damaged (and therefore cheap) but a lot of the fur is still usable.

I chose not to copy the cloud pattern on the original hat because I didn't find any appropriate gold braid, and I can always add a cloud pattern later if I find the right braid.  There are plenty of Mongol Period pictures showing hats without cloud patterns, so it can't have been mandatory.


This is the pattern I drafted.


The knot on top of my hat is hemp cord, wrapped with silk fabric.  I very much doubt this is a period construction technique, but it looks better than synthetic cord on an obviously silk hat.  Hemp cord was available in Central Asia from the Neolithic; hemp has a long history of cultivation in this region, where it was used for both textile manufacture and medicine.


HSF Challenge: The Great Outdoors

Fabric: 0.4 meters of blue/green shot silk and a small amount of fur.

Pattern: Drafted myself based on the picture.

Year: Probably anywhere from the 14th century up to today, which is a very impressive cultural tradition when you think about it.

Notions: Silk thread; Turk's head knot made from silk-wrapped hemp cord.

How historically accurate is it?  I must stress here that this is a speculative reconstruction.  I haven’t seen this hat or one like it in person, so I don’t know if this is really how the hat was made.  I don’t know for sure what materials it was made from, though I’d say silk is the most likely fabric and rabbit fur should be plausible. 

However, the silk is *ahem* dupioni.  I know.  I like the colour, and it isn't too slubby, and I needed relatively stiff fabric.  I remember hearing, though I forget where, that shot silk was being produced in China from a very early date, so I think the colour is okay.

Hours to complete: Four or five, not counting research time.

First worn: Quite often for fitting and testing the pattern.

Total cost: Probably about $18.

Wednesday, 30 July 2014

The Mycenaean weaving pattern

I promised I'd post the pattern I used to weave my decorative band from Tyrins, so here it is.  Each square on the graph paper represents two warp threads.


You can see there's a lot more to it than you typically get with an overshot weaving draft.  It's really three different patterns.  If anyone out there does use the pattern, please leave a comment.  I'd love to see what you do with it and hear any suggestions or improvements you have.

Here are some better photos of the finished band.


This one shows the underside, with all the messy supplementary weft floats.  They are every bit as much of a pain in the backside to keep track of as they look.


Tuesday, 29 July 2014

Recreating a piece of Mycenaean fabric

This blog is going to be all about my historical experiments.  Currently I’m doing both the Historical Sew Fortnightly and the Historical Food Fortnightly, and I really do need a place to put my research and so on.  Rather than file it away on a drive somewhere, I’m going to put it in a blog where other people can perhaps benefit from it.

Let’s kick off with something fun!  For HSF Challenge 10: Art I wanted to recreate a decorative band from a fresco found at Tyrins.


Hvitr,  woven band taken from afresco from Tyrins, 13th century BCE


As you can see, all I actually managed was a short piece of woven cloth about two inches wide, but you would not believe the time it took or the difficulty I had just to get this far.  I’ve always been impressed by the elaborately woven cloth shown in Minoan and Mycenaean art, and after attempting this project my admiration for those Bronze Age weavers has increased exponentially. 

I tried a whole lot of different ideas before I got this result.  I started with a wool warp, but the thin wool wasn’t suitable for the warp and kept breaking.  I had to start again with linen warp threads and a wool weft.  Bronze Age wool was structurally different from modern wool, so a Bronze Age weaver might not have had this problem.

So far as we know, Aegean Bronze Age textiles were made on warp weighted looms (as opposed to the ground looms used in contemporary Egypt).  In her 1991 book Prehistoric Textiles, Elizabeth Barber states that the patterns we see in Aegean Bronze Age art were most likely made using supplementary weft floats.  Having made this thing, I completely agree with her.  In fact I think supplementary weft floats might be the only way to reproduce this particular pattern.  I found that other types of weaving like tablet weaving and tapestry didn’t adequately reproduce the pattern on the fresco, and indeed there’s no evidence the Mycenaeans used these weaving methods.

Supplementary warp floats are essentially a type of brocade technique.  The main warp is woven normally in a tabby structure, while the supplementary weft threads “float” over various numbers of warp threads.  In this case the warp floats cover the entire surface of the band with no ground weave visible at all.  This type of weaving is also known as overshot, and it is possible to create very elaborate patterns this way.  Although this pattern looks simple, it is very complicated to weave – or it was for me – because there are five different colours of supplementary weft.  Google overshot weaving and you will find that most of the patterns out there use only one supplementary colour at a time.  There’s a reason for that.

For those who are interested, you can find an introduction to overshot weaving here.  You will notice that page tells you in bold font that your supplementary wefts must be thicker than your ground wefts.  This is something I learned the hard way and it is very important, but it’s easy enough to fix.  Just use two lengths of yarn for the supplementary weft and a single yarn for the ground weft.

Weaving this pattern would have been much easier if I was an experienced weaver and knew what I was doing.  This is actually only the second thing I’ve ever woven, but I imagine the original was made by someone who did have experience.  Nonetheless, I suspect this was a complex and relatively difficult design even by Mycenaean standards.  If you look at frescoes showing Mycenaean and Minoan clothes, you’ll see that the patterns don’t usually have as many colours as this one does.

High-end luxury textiles were extremely important to the Mycenaean economy and were exported in large quantities; see for example M.E. Alberti’s 2007 paper The Minoan textile industry and the territory from Neopalatial to Mycenaean times: some first thoughts, in Creta Antica 8, pp. 243-263 and The Management of Agricultural Land and the Production of Textiles in the Mycenaean and Near Eastern Economies edited by Massimo Perna; Francesco Pomponio, 2008.  Textiles were such big business in the Bronze Age Aegean that Mycenaean Knossos employed 900 textile workers.  

And here are all the HSF details.

The Challenge: Art

Fabric: this is the fabric.  It’s made of linen yarn and two-ply wool.

Pattern: my own interpretation of the pattern shown in the fresco.  In the future I’ll put the pattern up here for anyone who might be interested in seeing it or, god help you, using it.

Year: 13th century BCE

Notions: none.

How historically accurate is it?  Well, that’s a good question.  Sadly, we just don’t know.  We don’t even know for sure the band would have been woven; it might have been embroidered or even painted.  Given the evidence for complex weaving in Europe and the Aegean, I think it was likely woven, but that’s my opinion.

No textiles survive from this time period in the Aegean, so we only have surviving frescoes to tell us what the textiles were like.  Ultimately, all I can say is that I reproduced the design in the picture using materials and techniques that the Mycenaeans used.

Hours to complete: making this little band took me about 6 hours, on top of all the many many hours of research, trial and error, swearing, and unpicking.

First worn: N/A

Total cost: $20 for a couple of balls of yarn.  I already had some of the colours I needed.