Wednesday, 31 January 2018

No thank you, Mr Volstead

Human beings are problem solvers.  Other animals may be faster, stronger, or reproduce more quickly than us, but we think our way around problems.  So in 1920, when the Volstead Act outlawed the sale of intoxicating beverages, vast numbers of Americans discovered how easy it is to make alcohol.

Beer was easier to make than spirits, and didn't require any equipment that couldn't be found in a normal '20s kitchen.  This naturally made home brewing an attractive choice.  Making beer* at home was illegal under the Volstead Act, but in practice this part of the Act was too difficult to enforce and everybody knew it.  The Prohibition Commissioner himself admitted that "the government is not in a position to prosecute the non-commercial home brewer."

Prohibition-era beer recipes

The following is a fairly typical prohibition-era home brew recipe, kindly contributed by Stephen Hansen of Stanford University and published online by Realbeer.com:

  Ingredients: 
  • 1 can Blue Ribbon malt
  • 1 pack Fleishmann's yeast
  • 1 cup rice
  • 1 tablespoon salt
  • 5 pounds powdered cane sugar
Procedure: In a large (3 gallon) porcelain pan, add 3 quarts water and bring to boil. Add sugar, stirring. Bring back up to boil and add 1 can of malt. Return to boil again and let simmer for 15 minutes. Fill large glass 1/2 full of luke warm water (not over 130 degrees) and add rice, yeast, and salt. Clean crock and fill 1/3 full of warm water. Pour in wort. Add cold water to within 3 inches of top. Add yeast solution and cover. After 6- 10 hours remove foam with wire strainer. Let sit until hydrometer says "bottle." Fill bottles, adding 1/2 teaspoon sugar to each. Cap and let stand 21 days. Comments: Back when I first started making beer (about 20 years ago now) I actually made several batches using this recipe. The results varied from barely drinkable to snail bait. I especially like his comparison in the last line of the original---"This should make 5 cases of pint bottles of beer equal to or superior to Millers High Life."


The crock used in this recipe would have held around five gallons of liquid** and was intended for making pickles or sauerkraut.  Pickling crocks were a common piece of kitchen equipment during the early 20th century.  They were made of thick stoneware which helped to keep the beer at a nice even temperature for optimal fermentation.

Notice the recipe does not call for hops, which were already incorporated into the malt syrup.  Using a single can of hop flavoured malt extract supplemented with corn sugar or regular white cane sugar seems to have been the norm.  Supplementing (or even completely replacing) malt with other types of sugar had been relatively common in the United States during the colonial period because barley was not always available, and during prohibition home brewers revived this traditional practice.

Like their colonial ancestors, Americans of the '20s and '30s couldn't necessarily obtain malted barley.  But they could enjoy the latest modern convenience: concentrated malt extract packaged in convenient tins.

The malt to sugar ratio varied, but all the prohibition-era malt extract recipes I've seen use one can of malt and derive at least half the fermentable sugar from some type of baking sugar rather than malt.  Sugar was cheap, and readily available in large quantities without attracting suspicion from the authorities, but it does not make great beer.  This, in fact, is the main reason why recipes like the above example did not result in a very drinkable product: beer made with so much sugar would have been thin and unpalatable.

I suspect the reason so many prohibition home brew recipes were so similar is that they were all variations on the same original recipe.  If you had bought a can of Blue Ribbon*** malt and weren't quite sure how to turn it into beer, you could write to the address on the tin for a free recipe booklet.  It was a nice printed book containing a wide variety of recipes made with malt extract, and not a word about beer.  A couple of weeks later, you would get a plain brown envelope with no return address in the mail, which contained a mimeographed sheet of instructions for making beer.  This arrangement was in operation right up until the '70s, because home brewing was illegal in the United States until 1978.


Beer for everyone

Regardless of what the beer tasted like, these prohibition-era malt extract recipes were revolutionary.  They were very simple recipes made with inexpensive ingredients which were legal and available at the local grocery store.  Even if you had never made beer before and knew nothing about brewing, you could easily follow one of these recipes.

Using malt extract meant home brewers didn't need to mash their own grains to make wort, and this was important.  Mashing is time consuming, and requires the brewer to have some idea of what they're doing.  It also requires the brewer to obtain malted barley, and creates large quantities of spent grains which then have to be disposed of somehow.  Malt extract makes the brewing process less complicated, and more discrete.

Thanks to malt extracts and recipes that used them, home brewing became quick, easy, and inexpensive.  This allowed home brew to be made on a scale that has not been seen before or since.  It's impossible to know exactly how much home brew Americans made during the prohibition years, but the numbers we do have are staggering.

In Cleveland alone it was estimated that by 1923, 100,000 residents were making beer or spirits.  To put this into perspective, the 1920 census recorded a total of 116,545 dwellings in Cleveland.

In Detroit, the state Bureau of Taxation reported that 14 million gallons of home brew were produced between January and July 1932.  That was just the home brew they knew about.

These isolated data don't give us a comprehensive picture of home brewing during prohibition, but they do illustrate the popularity of home brewing, and the fact that it had become both accessible and convenient.


*  Making wine at home for personal consumption remained legal.  There were exemptions in place for wine due to its use in Holy Communion.

**  Prohibition home brew recipes typically yielded about five gallons, because that was the typical size of a pickling crock.  Even today most home brew recipes will yield about 5 gallons, and I have to wonder whether this is a remnant of the prohibition tradition that has somehow been retained.

***  Yes, that's Blue Ribbon as in Pabst Blue Ribbon.

Tuesday, 16 January 2018

A brief history of malt extracts


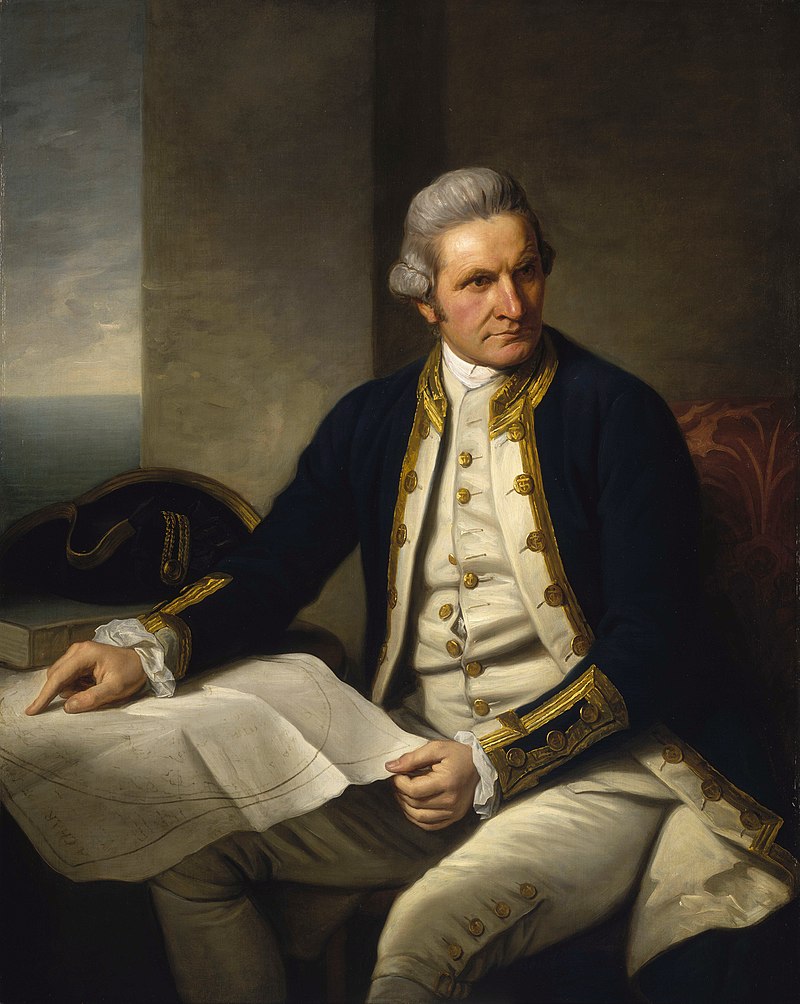
Captainjamescookportrait.jpg
Captain James Cook.
We learned in school that he was the first European to circumnavigate New Zealand, but what we didn't learn is that he was also one of the first people in the world to brew beer from malt extract.

Many brewers are suspicious of malt extracts, either because they think it's cheating (which it kind of is), or because they think it will make inferior beer.  Once upon a time that was true, too, but malt extract has come a long way over the years and the extracts available today will make excellent beers if used correctly.  This post is about the history of malt extracts.

Malt extract is made by taking the sugar extracted from malt during the mashing process and drying it, until it becomes either a syrup or a powder.  Some brands also contain hop extracts, so that the brewer doesn't need to purchase hops separately.  It is of course primarily used to make beer, but it is also used in cooking, and when I was a kid malt extract (without hops) was sold as a health food.  It was the '80s, when people were obsessed with health but somehow you could still get away with marketing concentrated sugar syrup as a health product.

In fact, malt extract does contain vitamins and minerals.  The British Navy was experimenting with malt extracts as early as 1772, trying to create an easily transportable concentrated malt to supplement sailors' diets and help prevent scurvy.  These first malt extracts were not a great success.  When Captain Cook took some on his second voyage to the Far East (1772 - 1775), his crew found that the beer they made with it had an unpleasant burnt taste.  However, it apparently improved when they added spruce leaves and molasses.  Eventually, the British Navy discovered that lemon juice was a more effective and less expensive way of preventing scurvy.

The trouble with early malt extracts was it took so long to boil away the excess water that by the time manufacturers produced a concentrated extract, the malt was burnt and unpalatable.  Technological advances in the late 19th century made it possible to boil the malt in a vacuum, which reduced the boiling time and created a better-tasting product.  At this stage malt extract was primarily a dietary supplement, but from the 1880s onwards British breweries began using it as a cheaper alternative to all-grain brewing.

The birth of modern extract brewing

Ironically, the glorious golden age of home brewing products we now enjoy began as a direct result of prohibition.  The kind of malt extract we're familiar with today, designed for the home brew market and often containing hops, was developed in the 1920s.  When the Volstead Act came into force American breweries could no longer legally produce beer, so they had to adapt, and one of the ways they did this was to produce malt extract instead.  Of course the extract could not be marketed as a home brewing product, so it was promoted as a baking ingredient.  This 1928 advertisement insists that Zobelein's Bohemian hop flavoured malt extract is a food product for use in cooking and baking.  Not for brewing at all.  Honestly.


Courtesy the Homestead Museum
Image from KCET.org

Customers knew perfectly well what the extract was really intended for.  Once you have malt syrup with hop flavouring conveniently added, you can make beer by simply adding water and yeast, and this clever innovation ensured that absolutely anybody could make their own beer.

Prohibition homebrew recipes tended to be a simple mixture of malt syrup, water, yeast, and sometimes corn sugar.  I'm hesitant to try one of these recipes because the results were often pretty horrible.    1920s malt extract was not as good as the extracts available today, and many Prohibition-era recipes didn't use it very well.

Malt extracts for craft brewing

The United States beer industry took a long time to recover from Prohibition.  Beer was produced commercially as soon as it became legal again, but the range of beers on offer was sharply reduced.  Beer enthusiasts who wanted styles that were no longer available were forced to make their own.

In New Zealand and Australia the primary reason for making home brew has historically been to save money, but like their American counterparts Antipodean brewers were also interested in making styles of beer that weren't available commercially.  Until recently the New Zealand and Australian commercial beer industries were decidedly basic, and anything more exotic than a lager or IPA could be difficult to get hold of.

Malt extract manufacturers responded to the increasingly sophisticated home brew market by developing more sophisticated products.  There is now a vast range of malt extract types available, and to some extent this has been enabled by the internet.  Thanks to Google it is easy to find recipes for any style of beer you like, as well as plenty of tips to help home brewers achieve good results whether they're using grain, malt extract, or a combination of both.

To paraphrase Leibniz, everything that is marketable demands to exist.

Tuesday, 18 April 2017

Finished shaft grave helmet


Here it is folks, the shaft grave helmet is all done.  Sorry it's taken me so long to get this post up; life gets in the way sometimes.

This helmet was much easier to make than my last beehive helmet, and definitely faster, mainly because this time I had a better idea of what I was doing.  Otherwise it's fundamentally the same thing as my Phaistos helmet; the differences in shape and style are largely superficial although, as I'll explain, I do think the shaft grave style would offer better head protection.


So how historically accurate is it?  That depends on how correct our understanding of beehive helmets is, which we don't know for sure.  Unfortunately we don't have any surviving Mycenaean helmets to study, so any reconstruction necessarily involves some conjecture.  Based on art, literature, and archaeological finds it is possible to make deductions about how Mycenaean helmets were made and what materials they were made from, and I like to think this is a reasonable reconstruction based on the evidence available.

Here's what the shaft grave helmet looks like when worn:


Selfies are acceptable for research and/or educational purposes.

As you can see there's a lot of bulk in the helmet to cushion my skull in the event of an enemy hitting me over the head with a blunt object, or firing a sling stone at me.  Even at the lower edge of the helmet, which is its thinnest point, there's a good inch and a quarter (30mm) of padding and tough leather.

Although my shaft grave helmet is the same basic construction as the Phaistos helmet, I think it would do a slightly better better job of protecting the wearer's skull because of the extra padding.  Helmets made this way are naturally thinner around the lower edge, and placing curved pieces of leather stuffed with linen around the lower edge is one way to increase the level of protection the helmet provides in this area.


This is the internal structure of my Phaistos helmet.  You can clearly see how the thick bundle of leather strips at the top gives more protection than the lower rim, which is just one layer of leather.  Adding extra padding around this area makes sense.


Sunday, 12 March 2017

Assembling the shaft grave helmet

Nearly complete shaft grave helmet, with its outer shell in place.


At this point the helmet looks finished, and it nearly is, but it doesn't yet have a felt liner.  Just like the Phaistos helmet, the leather components are stitched together with strong linen thread.  The joins are covered in red felt, which acts a little like a gasket and hides any places where the joins are a bit scruffy.

In this case the helmet shell consists of a conical top piece, and two curved cylinders studded with metal discs and stuffed with linen (see my first post on the shaft grave helmet for a cross sectional diagram).  I had a long think about whether I should glue the linen and then decided not to.  Aldrete et al, who quite literally wrote the book on linen armour, found the linen layers didn't necessarily have to be glued together.  The important thing is that you have a lot of layers of springy stuff to absorb the impact of any blows you receive.  Schlieman did recover a small fragment of linen armour from shaft grave V, which consisted of 14 layers and may have been part of a linothorax, but I don't know whether the layers had been glued or not.  It may not have been possible to tell.  Greece really does not provide good conditions for the preservation of organic material; even the skeletons in the shaft graves were not very complete.

In any case I found it was easy enough just to stuff the linen in there, so this helmet is padded with layers of unglued linen strips.


Helmet shell with linen padding inside.


Where the stitching holes are visible I've made them the historical way, with an awl, but many of the holes are covered by felt binding so I cheated on those and used a metal punch.  This is a punch designed to make holes in steel plate, and it is the easiest way of making holes in armour leather.  It's not historically accurate, but I find by the time I've bored a few dozen holes in 5mm armour leather with an awl I don't really care.  If you look closely at the holes it is possible to see they were made with a punch, so I do make sure I only use it on holes that will be covered.


The holes you can see here were made with an awl.


A note about the metal studs you can see in these pictures: they are made from a modern ferrous alloy instead of bronze, but they look like bronze age helmet studs.  They're fixed to the leather with a pin in the back.  Studs like these have been found in bronze age burials, but I'm not aware of any studs with pins from the Mycenaean shaft graves.  There are small bronze discs that may have been used to reinforce helmets, but they have perforations around the edges and were sewn onto whatever they were attached to.  Assuming they were helmet reinforcements, this makes me wonder whether the helmet shell might have been covered in linen (or other textile), with the discs sewn onto that.  It would even be possible to make the shell for one of these helmets entirely out of laminated linen instead of leather.

Wednesday, 8 March 2017

Shaft grave helmet: shaping

I made a core for the shaft grave helmet in much the same way as I did for the Phaistos helmet, except that this one has the leather strips tied around a bundle of horse hair.  This version went together much easier than the Phaistos one, because now I have a better idea of what I'm doing.  Notice how the bundle of strips at the top is sewn together?  The strips have holes in them and there's a length of strong linen thread twined through the holes.  This is important.  Just tying the leather strips together like a bundle of sticks doesn't work very well because the thread is inclined to slide upwards and pop off the top, and then you're back to square one.  Only the outer ring of strips need to be sewn; they keep all the other strips in place.


See how those strips are sewn together?


Now it's time for me to make the leather shell.  The curved padding around the bottom of this helmet will be made from leather stuffed with linen.  These pieces are simply long strips that have been shaped to form curved ridges.  As I've discussed before on this blog, veg-tanned armour leather can be soaked in hot water and then moulded.

In this photo the pieces have been soaked, curved, and stretched.  But as you can see, they're still not quite the right shape.  The edges don't curve inward all that well.  Even when softened, there's a limit to how much armour leather will stretch.


These edges don't curve nicely.


The solution is to notch the leather the way you would notch a curved seam on a garment.  I've cut small notches along the edges of the pieces, then soaked and shaped them again.  Now they fit around the helmet base much better.


These edges do curve nicely, even at the top where the curve is fairly steep.


I found it's important to cut the notches from the wrong side of the leather.  That way they end up being slightly smaller on the right side, and when you soak and shape them again they'll close up nicely.


Notice how the notches are a little wider on the inside than on the outside.  The notches should not be large - these are about 7mm long by 3mm wide.

Next time: assembling the helmet shell.

Monday, 6 March 2017

It's helmet time again!

Thanks to the magical carnival of capitalism that is Ebay, I've managed to acquire some horsehair.  And that means it's time for another beehive helmet, with a plume on top.

This time I'm reconstructing a helmet shown on a ring from Shaft Grave IV at Mycenae.  It's a very similar style to the Phaistos helmet, but with extra padding around the lower edge.

Notice how these helmets have what look like horizontal ridges around the bottom.  This is not unusual with the earlier beehive helmets and likely represents strips of leather that have been padded with either linen or wool, to provide extra protection.  The padded leather has been further reinforced with circular metal attachments.  Because of the way beehive helmets are constructed they're naturally thinner at the bottom, so it makes sense to put a bit of extra protection in this area.

Image from Bensozia


The following doodle illustrates what I think we're looking at here:


Blue lines represent the inner core of the helmet, and black lines represent the outer shell.  You can see where there's space for extra padding between the core and the shell.

The archaeological record tells us a lot about what a Mycenaean's helmet had to protect him from, and why a good thick helmet was desirable.

Head injuries, particularly blunt force ones, seem to have been common on Mycenaean battlefields.  We don't have a lot of skulls from Bronze Age Greece, but a number of the ones we do have show evidence of combat injuries and some had undergone trepanation surgery.  This would have been done to treat intracranial pressure caused by a blow to the skull, or to remove splinters of bone from a head injury.

The reason these people sustained blunt force head injuries is that they were, quite literally, hitting each other over the head with hammers.  This is a stone hammer from 1525-1450 BCE.  It is about 10cm long and would have been fixed to a wooden handle.


Hammer-head from Zakros.


Other weapons likely to cause head injuries were maces, axes, and slingshots.  Early Mycenaean swords were designed for thrusting or stabbing and would not usually have been a source of head injuries, but as we've seen there were many ways to sustain head injuries on a Mycenaean battlefield.

My friend informs me that the ancient Hungarians also practiced trepanation.  They covered the hole in the skull with a metal plate to protect the brain, and had a surprisingly low incidence of infections.  And did you know that the Hungarian word for a smart person literally means "brain drilled"?


Sources discussing skulls and skull injuries

Alusik, T.  2015.  Skull Trepanations in Bronze Age Greece: An Archaeologist’s View.  World Neurosurgery, 84, 2:214-217.

Arnott, 1997.  Surgical Practice in the prehistoric Aegean, Medizinhistorisches Journal.  Band 32, Heft 3-4.

Castleden, R.  2005.  Mycenaeans.  Routledge: Oxon.

Papagrigorakis, M. J. et al, 2014.  Neurosurgery During the Bronze Age: A Skull Trepanation in 1900 BC Greece. World Neurosurgery, 81, 2:431-435.

Saturday, 11 February 2017

Pseudo-Sumerian beer: the first experiment

Last year I made Sumerian beer, using a recipe from 1800 BCE.  It was good stuff, so I decided to try modernizing the recipe.  The aim of the game here isn't to recreate Sumerian beer, but to create a modern style that retains the characteristics of Sumerian beer while being more appealing to 21st century beer drinkers (i.e. me).  Mostly, that means carbonating it.  Last year's Sumerian beer was quite drinkable, but I would have preferred it to be carbonated and I would also have liked just a hint of hops.  The Sumerians didn't have hops, but I like them, especially the aromatic types like Tettnang and Cascade.


Pseudo-Sumerian beer


As you can see, the pseudo-Sumerian beer is a dark amber colour with a moderate head.  The taste is malty with a hint of caramel from the dates and some nice Amarillo top notes.  I chose Amarillo hops because they're not too overpowering and have a delicate citrus flavour that works well with dates, which were an important ingredient in Sumerian beer.  The hop flavour is not especially strong, but it's enough to cut through the sweetness of the malt and provide a bit of complexity.

Like the original Sumerian beer, this recipe uses barley malt, dates, and bappir.  Making bappir does take time and adds an extra step to the brewing process, but without it the beer wouldn't taste the same and you can make it ahead of time.  I described how I make bappir in this post - it's just malted barley, a little bit of spice, and some date honey mixed into a dough and then baked.

This batch came out at around 3% alcohol by volume, because I screwed up.  I hadn't used Black Rock malt before and didn't realise that you're supposed to use two cans for a 23 liter recipe, not just one.  However, there are occasions where you might want a low alcohol beer and this is a good choice.  It tastes much better than most of the light beers you can buy in Australasia.

Pseudo-Sumerian beer (PSB) recipe

500 grams bappir
250 ml date honey, which is dates that have been soaked in hot water and pureed - dried dates are fine and much cheaper than fresh ones
1 can Black Rock Amber liquid malt extract - please note that this should actually be two cans if you want a full strength beer
500 grams The Brew House light dried malt extract*
50 grams Amarillo hops, boiled for 1 hour
1 sachet dried ale yeast - you can get away with using bread yeast


The bappir needs to be mashed, but this is fairly simple.  You just crumble it into a ceramic casserole dish, cover it with boiling water, and leave it with the lid on for an hour.  Using a ceramic casserole dish keeps the heat in and thus helps extract the sugar from the bappir.

Strain the bappir mash into a 10 - 15 liter pot, then add three liters of hot water, both cans of amber malt extract, the date honey, and the dried malt extract.  Make sure the malt extracts are fully dissolved, then boil the wort until the protein break occurs and foam forms on top.  You'll also want to boil your hops while you prepare the wort.  After the wort has boiled you can strain the boiled hops into it, tip it into your fermenting barrel, top it up with cold water to make 23 liters (or 6 gallons if you're American), and pitch your yeast once it reaches the right temperature.

There are two key differences between this pseudo-Sumerian beer and real Sumerian beer.  One difference is the inclusion of hops, and the other is that I fermented my PSB a lot longer than the Sumerians probably did.  As I discussed in a previous post about Sumerian beer, I don't think the Sumerians used secondary fermentation.  They did not know how fermentation works, and may not even have understood the concept of secondary fermentation.  Since their brewing conditions would not have been very sanitary by 21st century standards, they may also have found it was unwise to leave their beer fermenting any longer than a couple of days.

Secondary fermentation starts to occur about three days into the fermentation process.  By then the yeast has consumed most of the sugar in the wort and has produced almost all the alcohol it's going to produce.  It then starts to metabolise more complex carbohydrates, which improves the taste of the beer and helps get rid of any off flavours.  Secondary fermentation is therefore an important part of the modern beer making process.  I left my pseudo-Sumerian beer to ferment for two weeks to ensure it got a secondary fermentation, then bottle conditioned it for a further two weeks.


* Feel free to substitute other brands of malt extract.  You just need an amber malt and a little light malt to supplement it.